Manage Customers
Learn how to create and manage customers and their details in the vendor dashboard.
On this page
In this guide, you'll learn how to create and manage customers and their details.
Create a Customer
You can create a customer through the Aiminaabee vendor dashboard, which is useful if a customer is creating an order offline. The customer will be a guest customer; to register, the customer must register through the storefront.
To create a customer from the vendor dashboard:
- Go to the Customers page.
- Click the Create button in the main section's header.
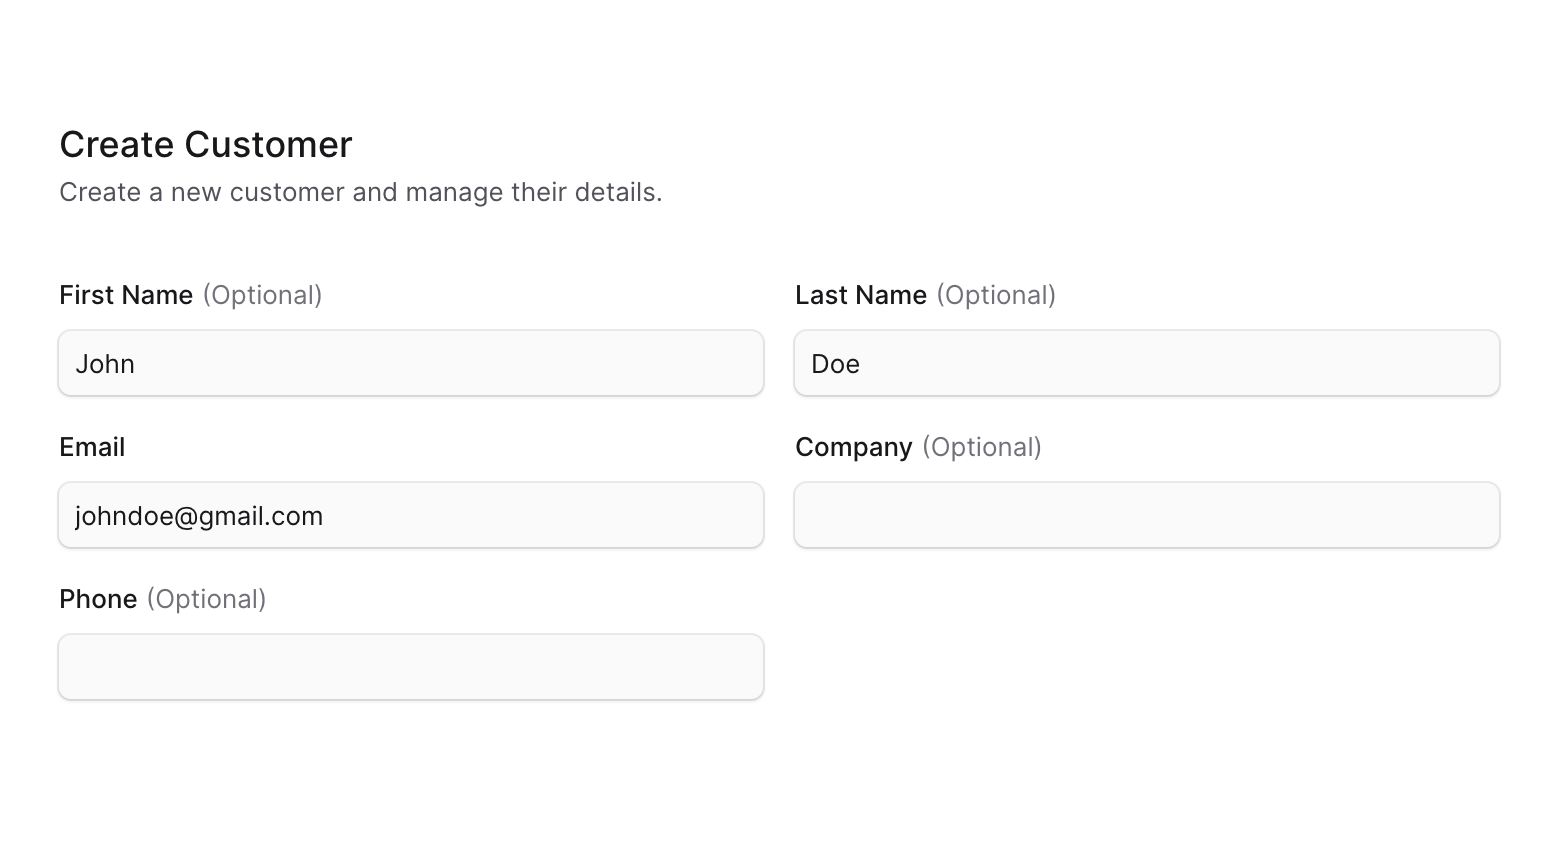
- In the form that opens, enter the customer's email, and optionally their first and last name, company name, and phone number.
- When you're done, click Create.
View Customer Details
To view a customer's details:
- Go to the Customers page.
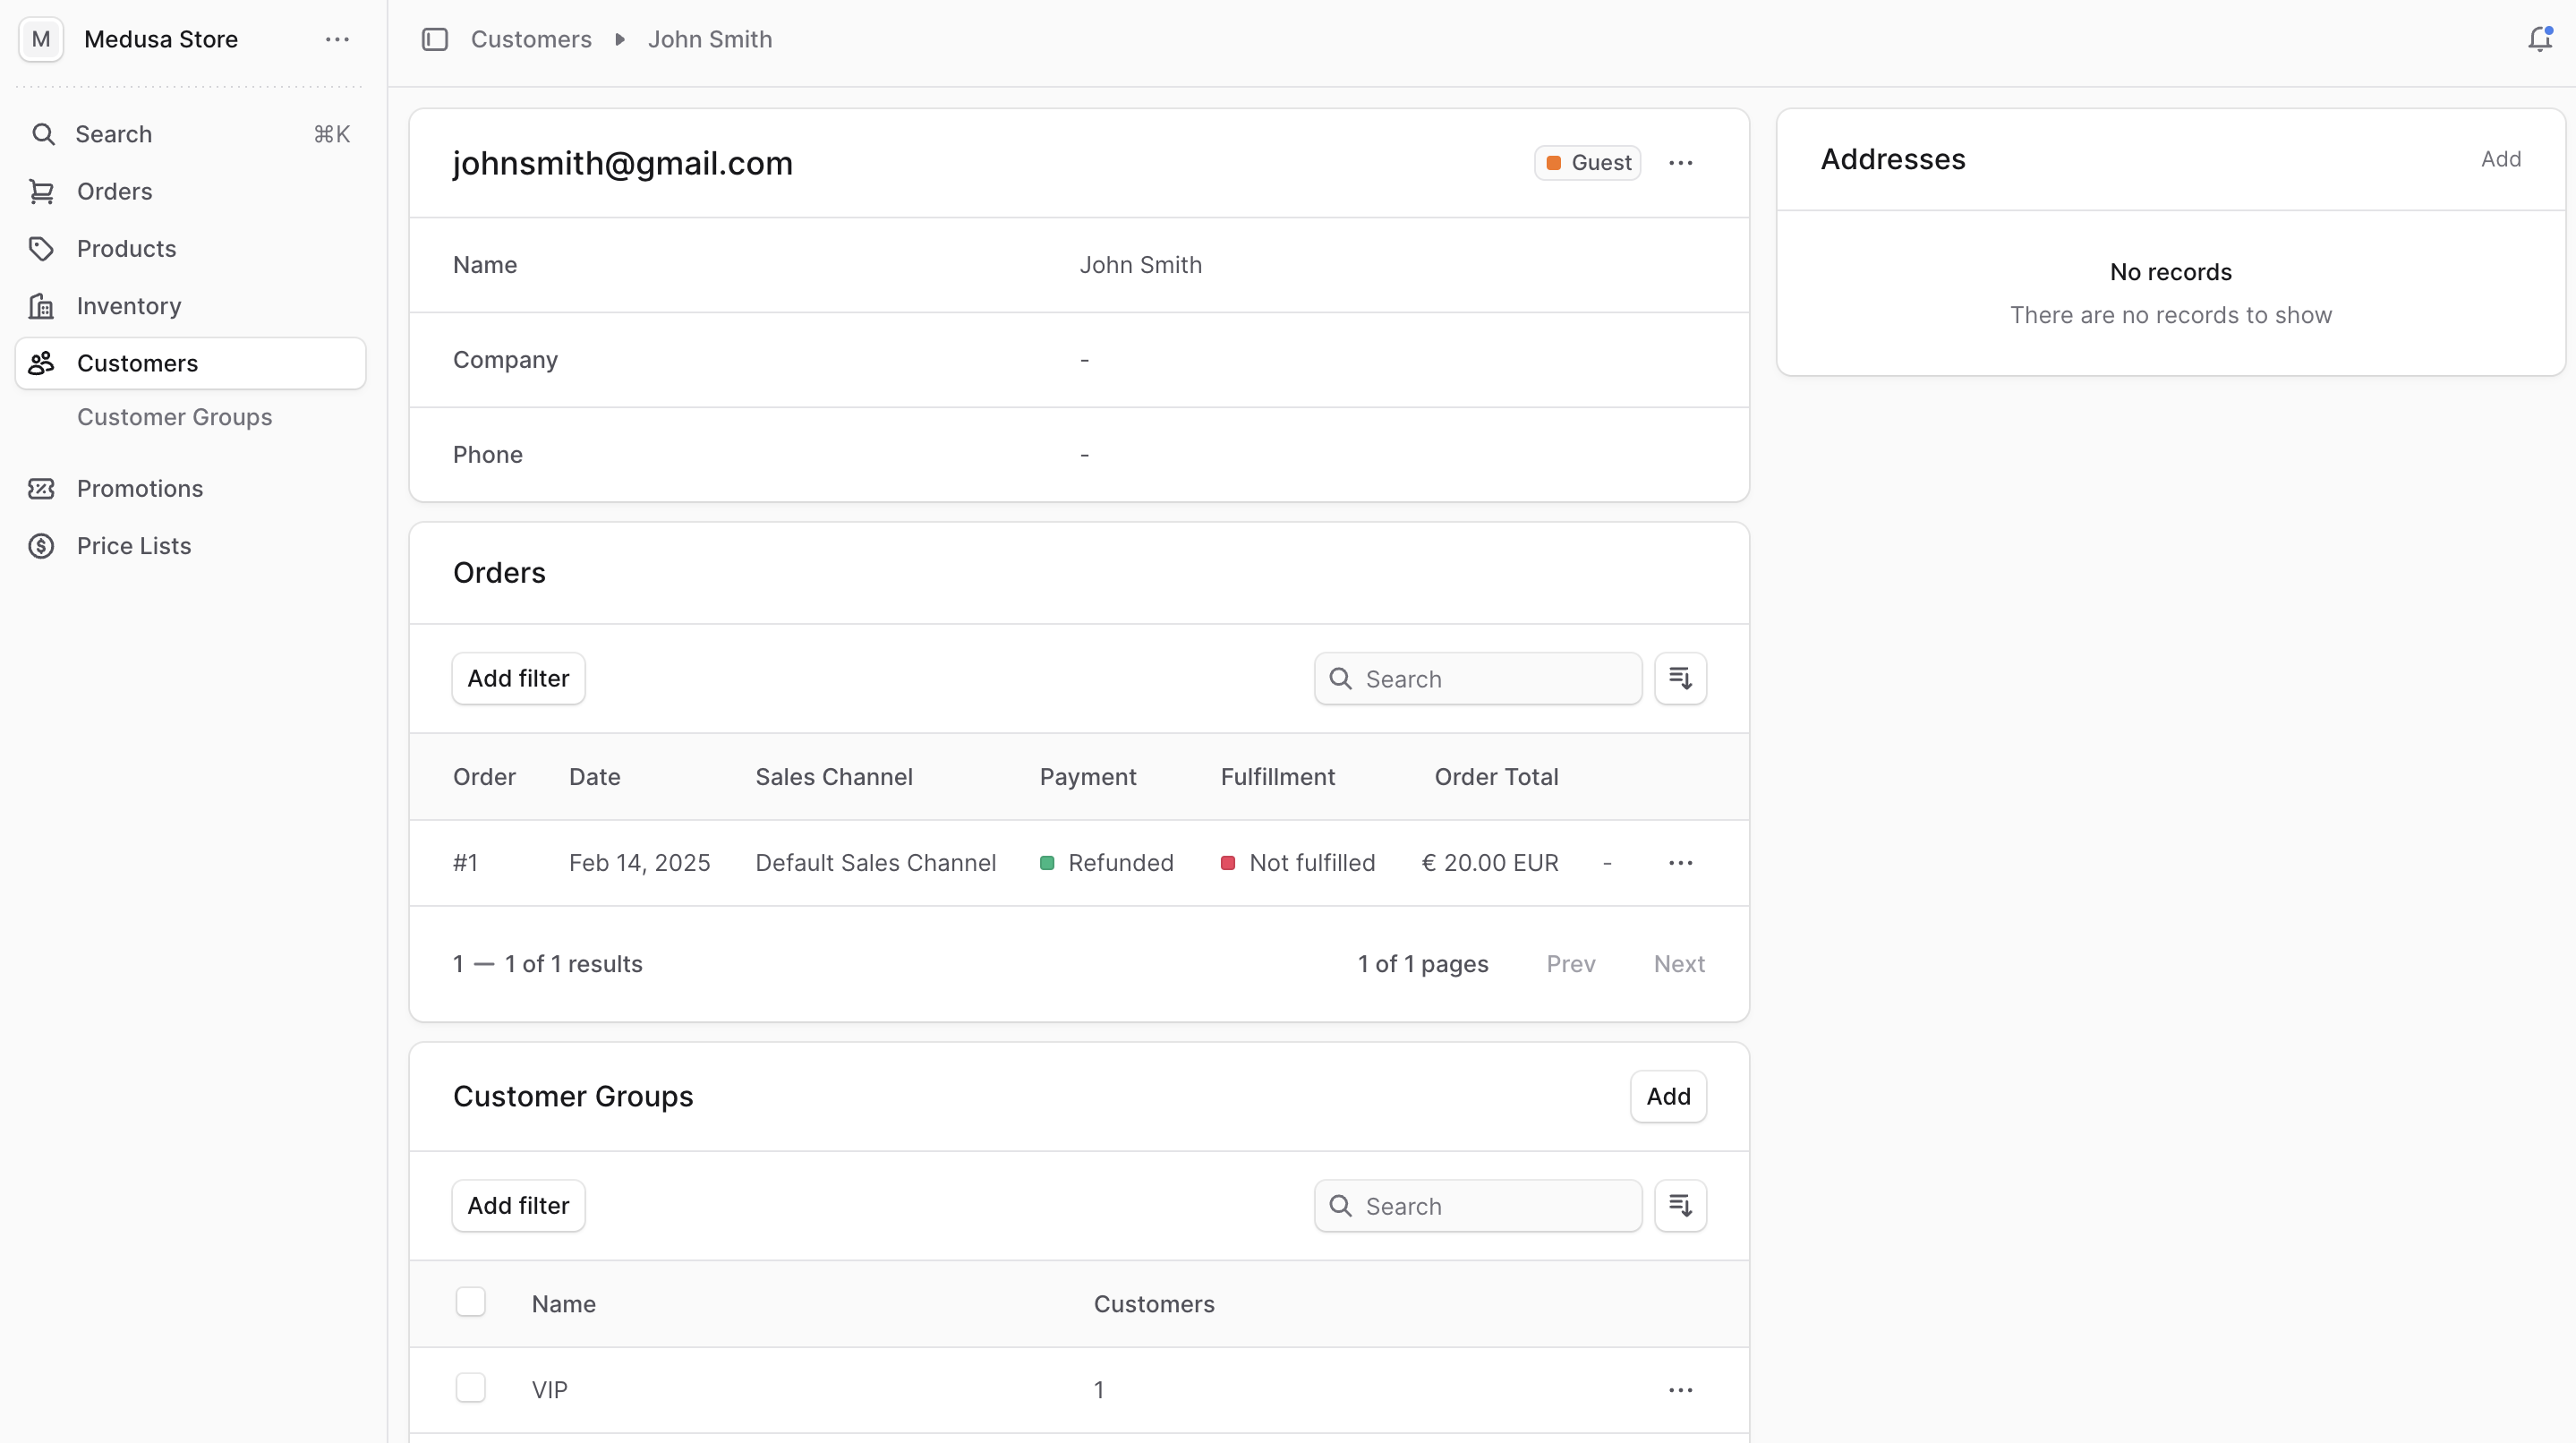
- Click the customer you want to view.
Customer Type
In the first section's header, you can see a badge with the customer's type:
| Customer Type | Description |
|---|---|
| Registered | Customer with a storefront account. |
| Guest | Customer without an account, including customers you create in the vendor dashboard. |
Edit Customer Details
You can't edit a customer's password from the vendor dashboard. The customer has to reset it from the storefront.
To edit a customer's details:
- Go to the customer's details page.
- Click the three-dot menu in the first section.
- Choose Edit from the dropdown.
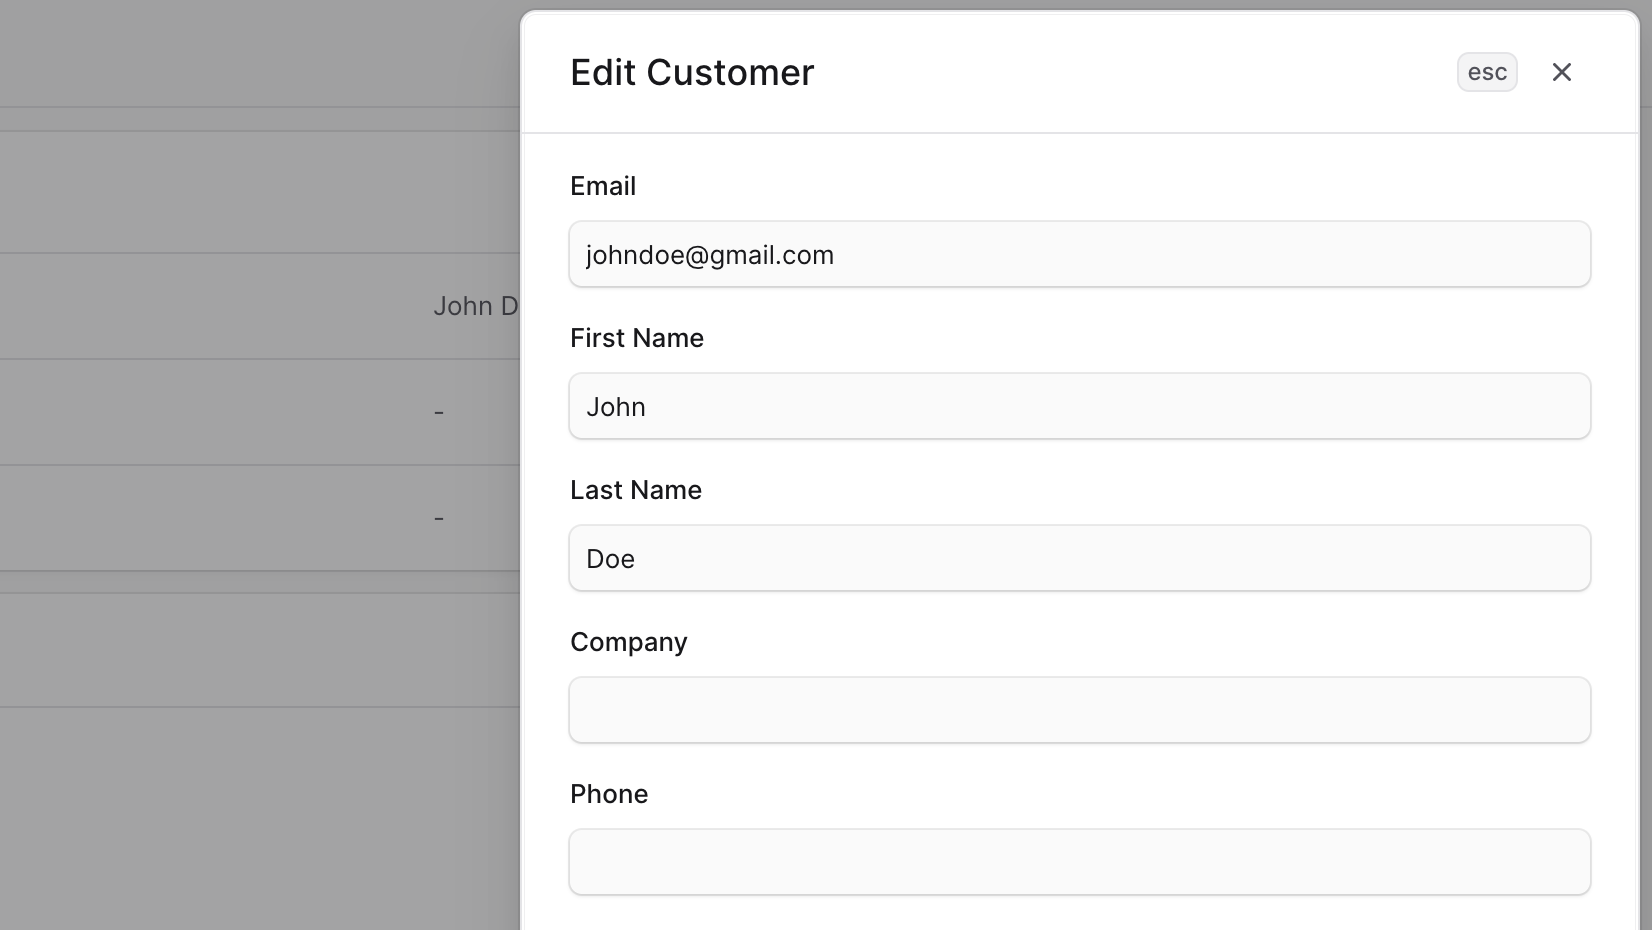
- In the side window that opens, you can edit the customer's email, first and last name, company name, and phone number.
- When you're done, click Save.
View Customer Orders
You can view a customer's orders from their details page in the Orders section. By clicking an order, you can view its details.
Transfer Order to Another Customer
You can transfer an order to another customer. For example, when a guest customer registers, or a customer created an order offline.
When you transfer ownership of an order, the original customer receives a notification, such as an email, requesting their approval for the transfer. The order is transferred to the new customer only after the original customer approves the transfer.
You can't transfer ownership to a guest customer, including customers you create through the vendor dashboard.
To transfer a customer's order ownership to another customer:
- Go to the customer's details page.
- In the Orders section, click the three-dot menu in the order's row.
- Choose Transfer ownership from the dropdown.
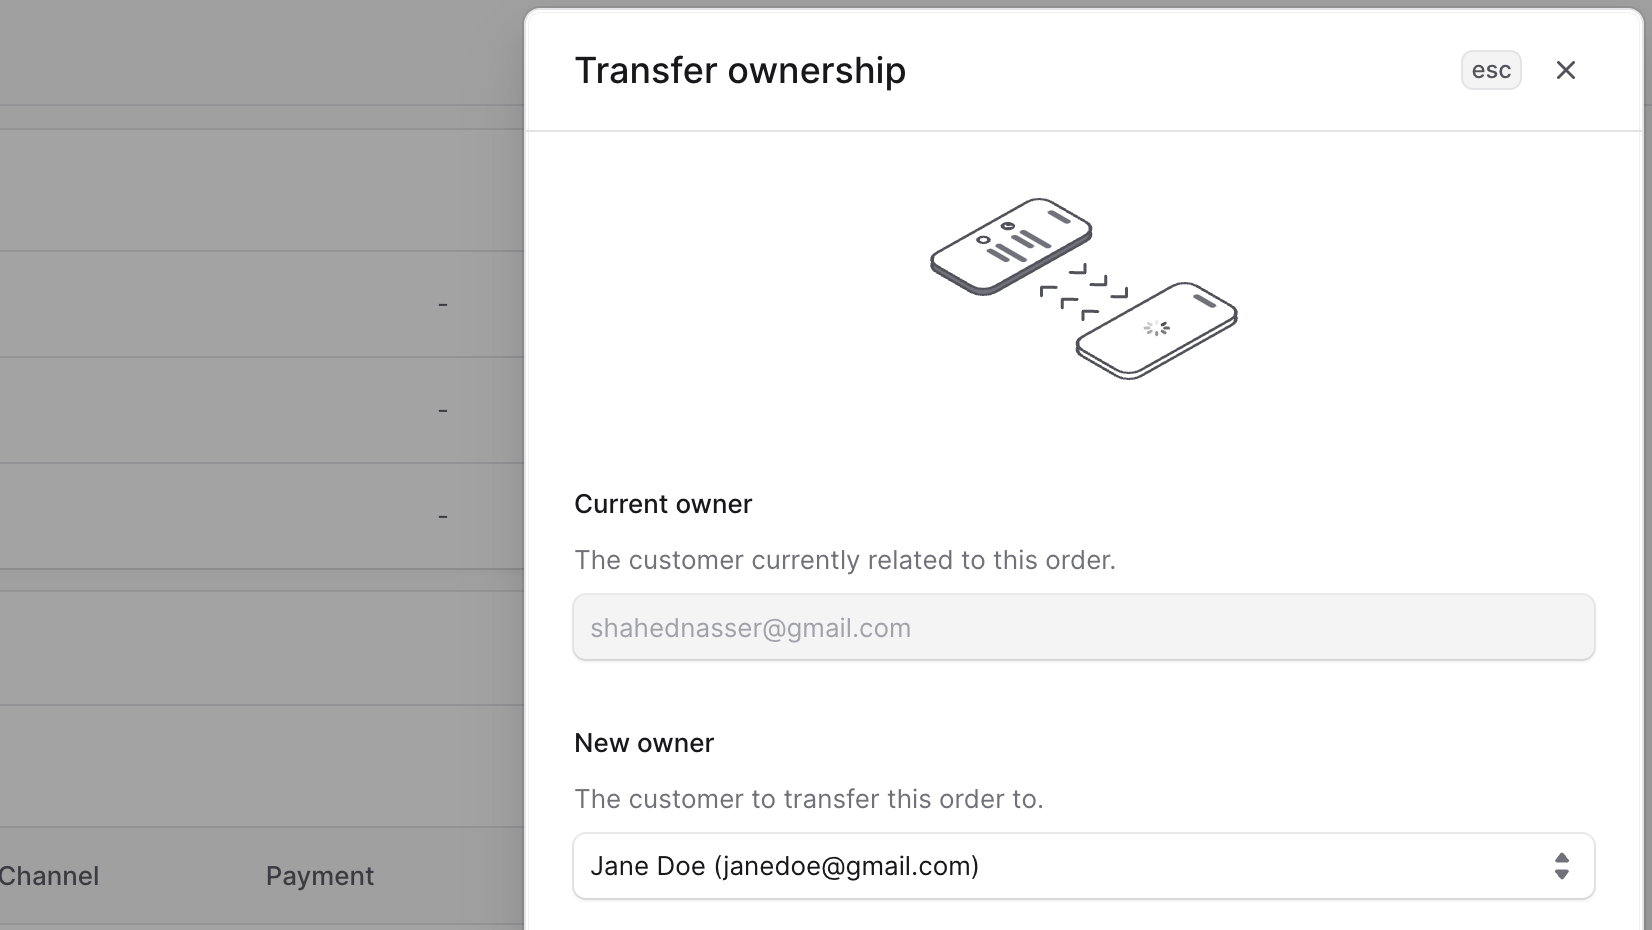
- In the side window that opens, choose the customer to transfer the order to in the New owner field.
- When you're done, click Save.
The original customer will then receive a notification requesting their approval for the transfer.
If a notification isn't sent, check with your technical team to debug the integrated notification service.
Manage Customer's Groups
You can add a customer to multiple groups, allowing you to offer different promotions or pricing based on the group they belong to.
Add Customer to Groups
To add a customer to customer groups:
- Go to the customer's details page.
- In the Customer Groups section, click Add.
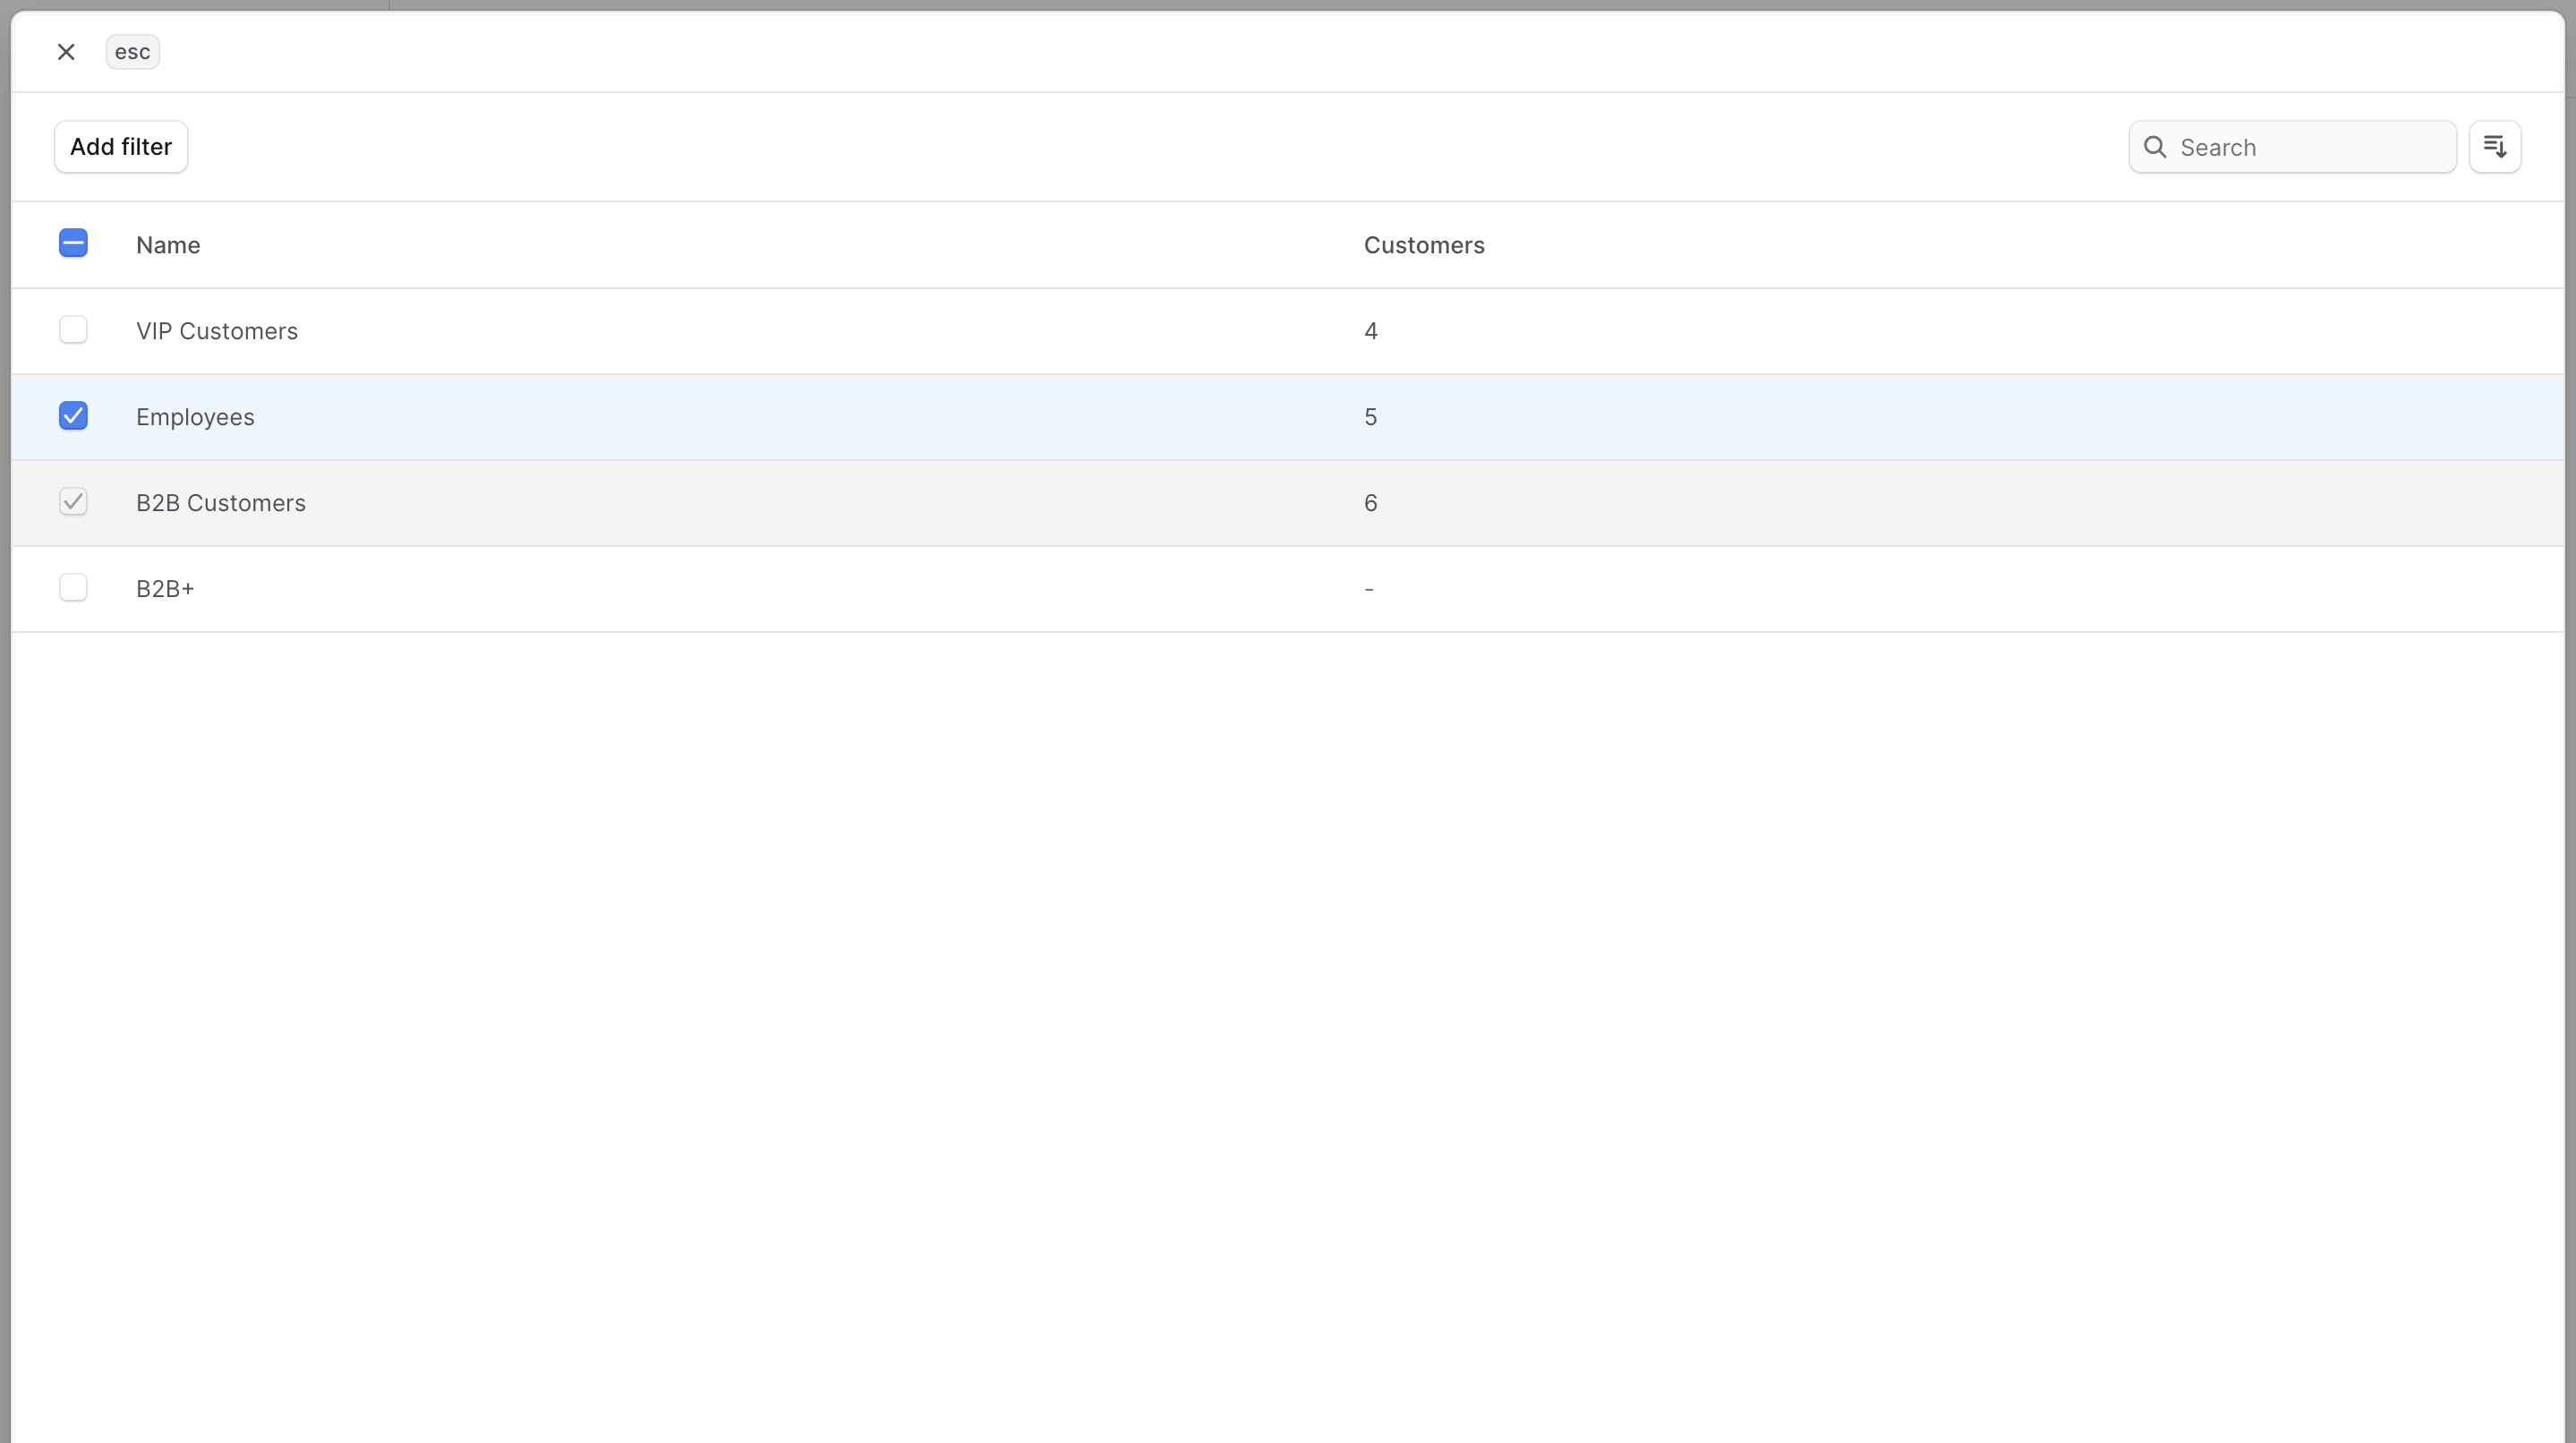
- In the list that opens, check the groups you want to add the customer to.
- When you're done, click Save.
Remove Customer from Groups
To remove a customer from customer groups:
- Go to the customer's details page.
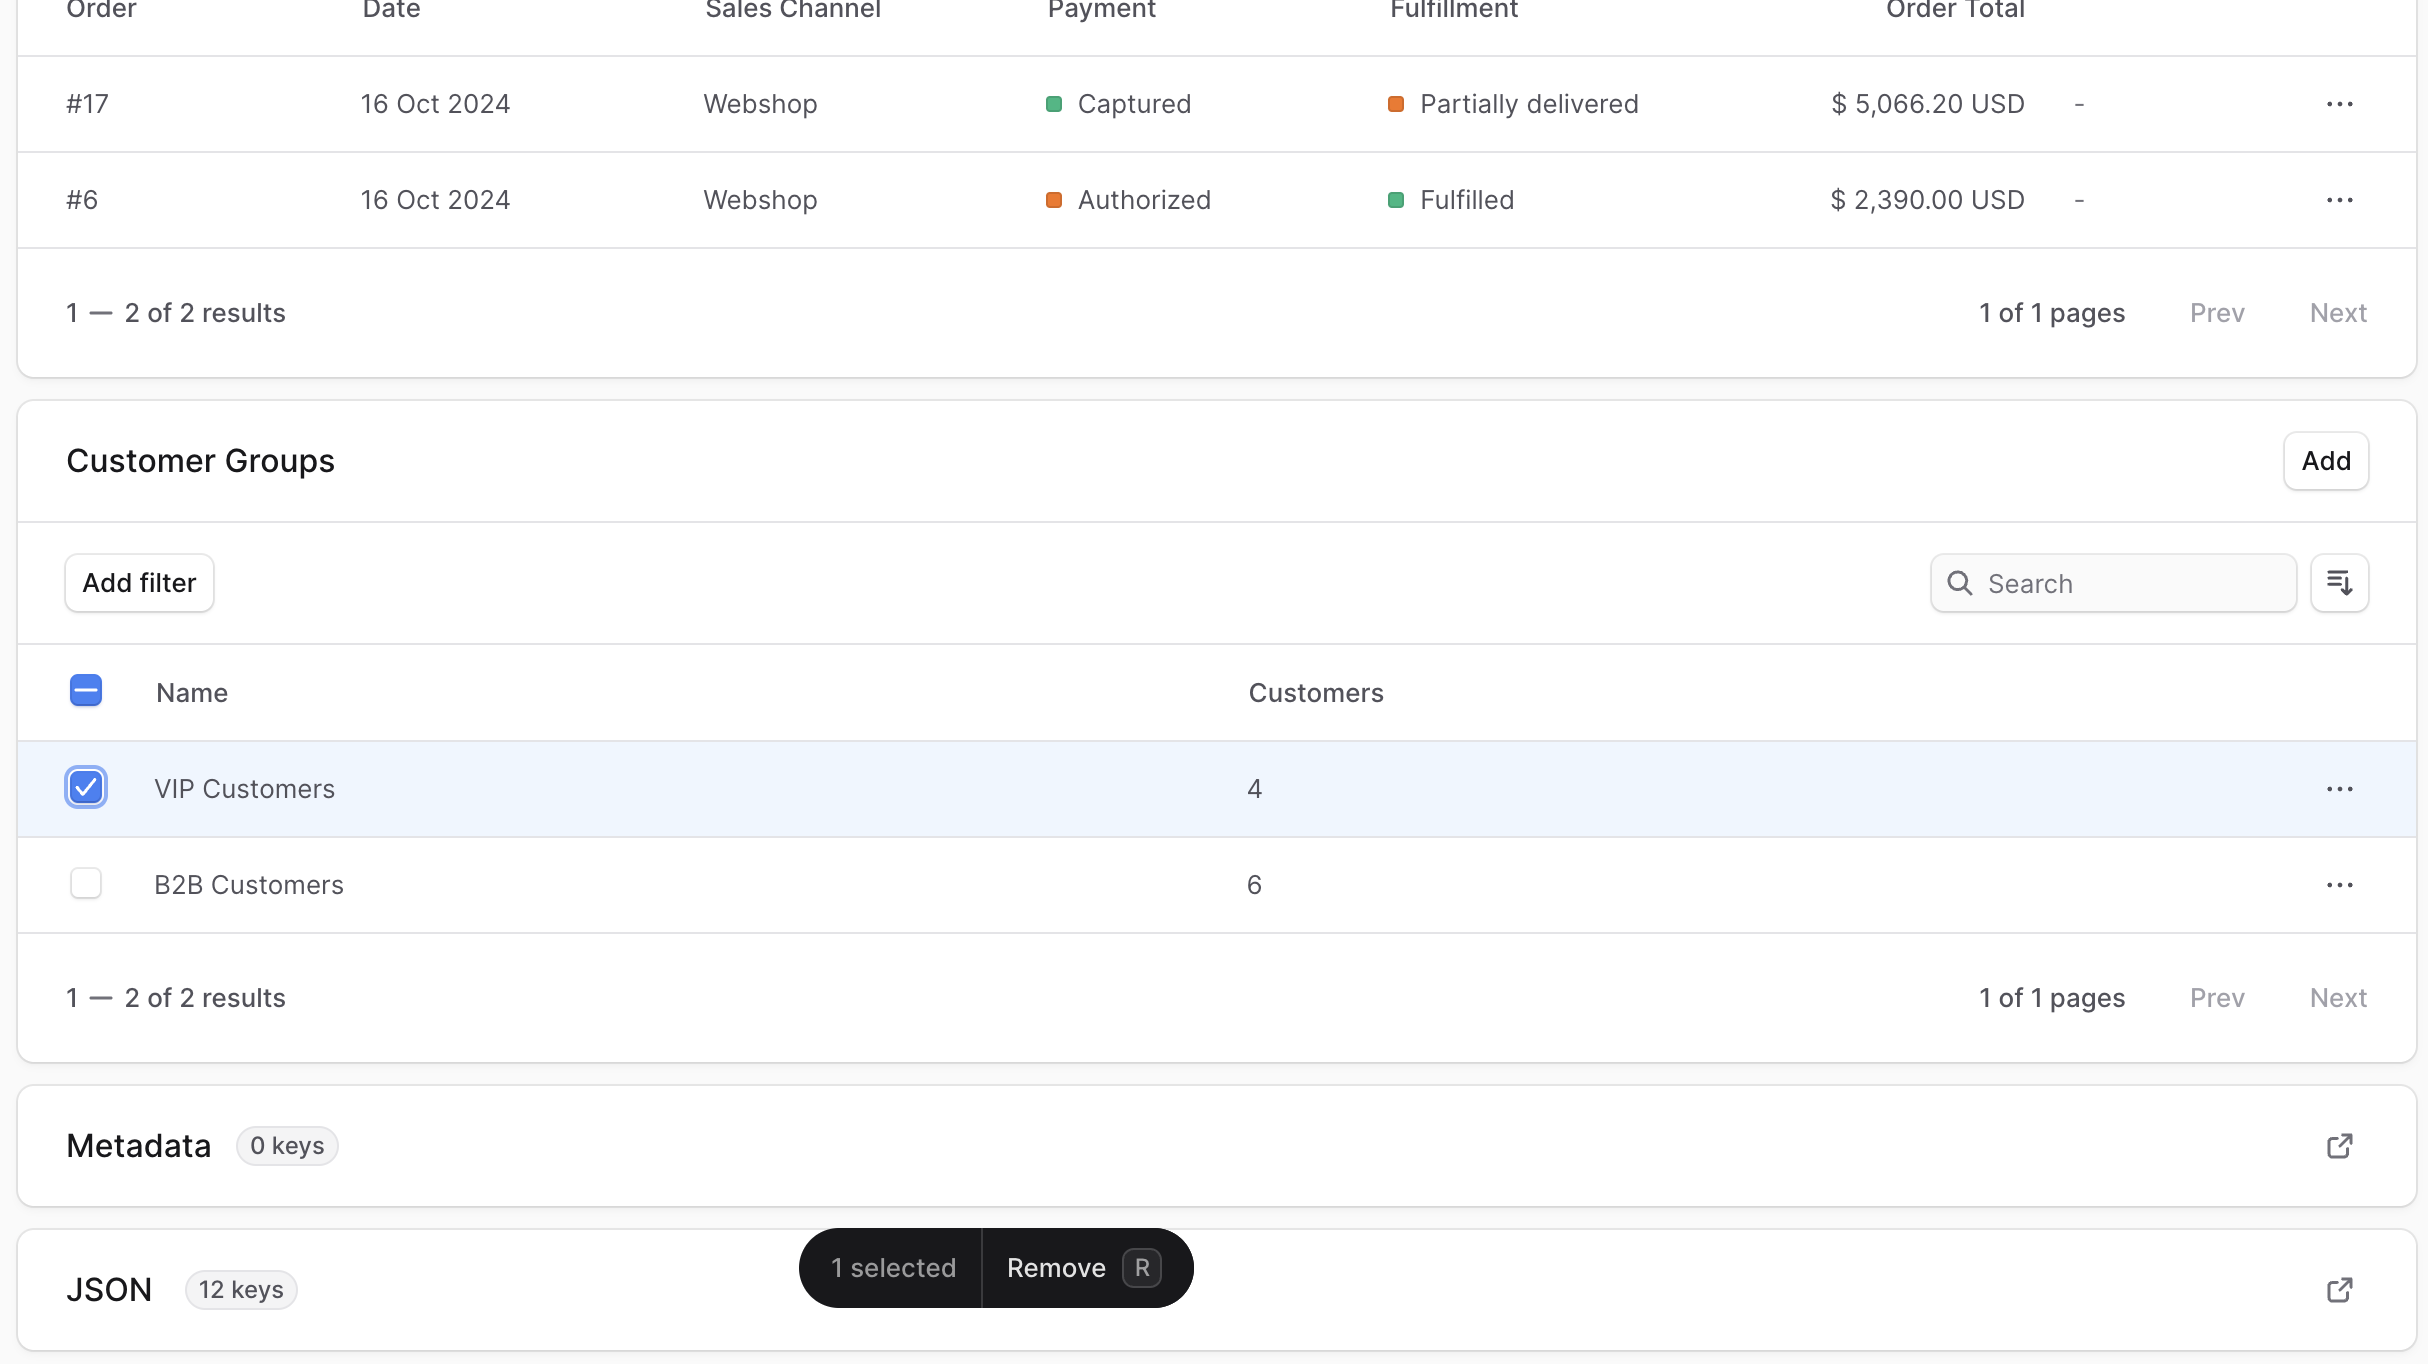
- In the Customer Groups section, check the groups you want to remove the customer from.
- When you're done, either press R or click Remove at the bottom center of the page.
- Confirm removing the groups by clicking Remove in the pop-up.
Edit Customer Metadata
Metadata is custom data that can be associated with the customer in key-value pairs. This is usually used by developers for custom integrations or to store additional information about the customer.
To edit the customer's metadata:
- Go to the customer's details page.
- Click the expand icon in the Metadata section.
- In the side window that opens:
- Manage the key-value pairs in the table.
- To add a new row of key-value pairs before or after a row:
- Hover over the row and click the three-dot menu at its end.
- Choose Insert row above or Insert row below from the dropdown.
- To delete a row of key-value pairs:
- Hover over the row and click the three-dot menu at its end.
- Choose Delete row from the dropdown.
- When you're done, click Save.
Manage Customer's Addresses
You can view and manage a customer's addresses from the Addresses section on the customer's details page. This is useful when you need to make changes to the customer's shipping or billing address for an order.
Add Customer Address
To add an address to a customer:
- Go to the customer's details page.
- Click Add in the Addresses section header.
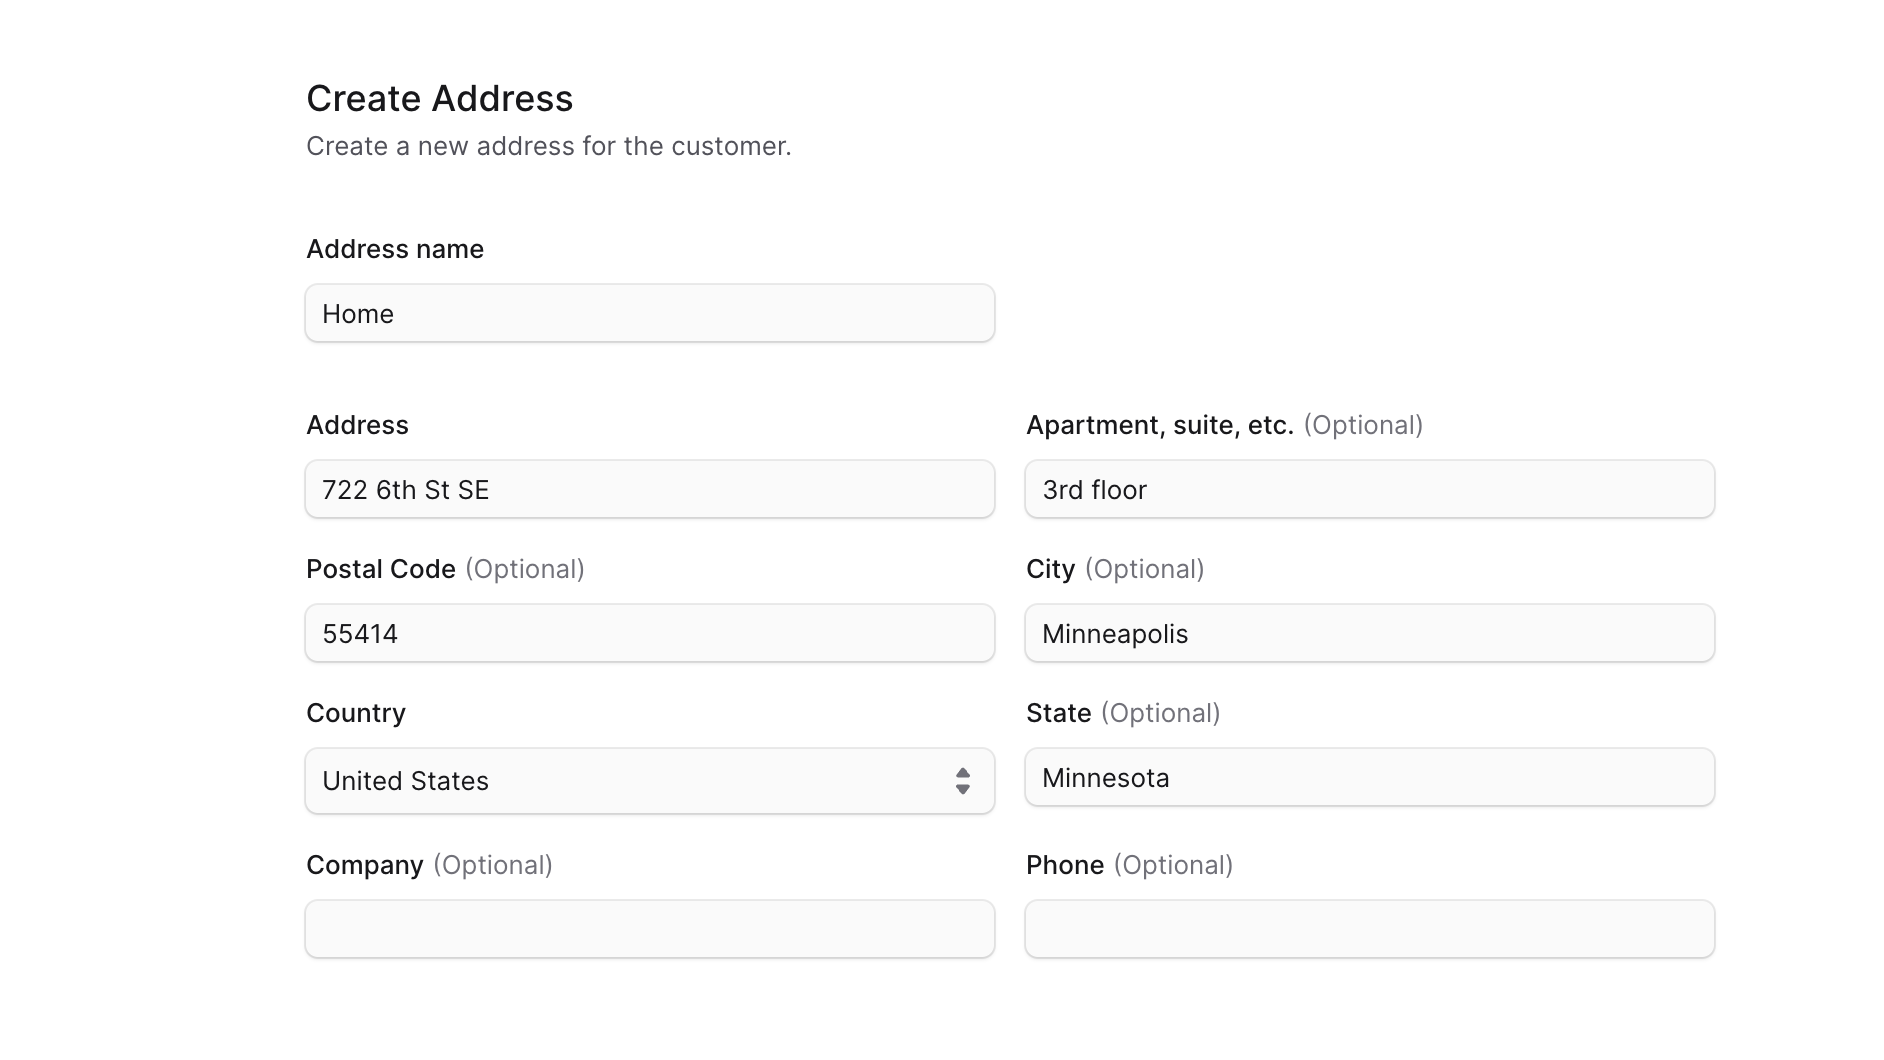
- In the form that opens, enter the address details including name, address line, apartment, postal code, city, country, state, company, and phone number.
- When you're done, click Save.
Delete Customer Address
Deleting an address is irreversible.
To delete a customer address:
- Go to the customer's details page.
- Find the address in the Addresses section.
- Click the three-dot menu in its row.
- Choose Delete from the dropdown.
- In the pop-up, enter the address name and click Delete.
View Customer's Store Credits
If store credit is enabled for your store, customers can have store credit accounts. These accounts allow you to credit customers manually, or when you issue a refund for an order. Customers can then apply the store credit balance at checkout.
To view a customer's store credit accounts:
- Go to the customer's details page.
- In the Store Credits section, you can see all store credit accounts linked to the customer, along with their current balance and currency.
By clicking an account, you can view its details and transaction history, and credit the account.
Delete a Customer
Deleting a customer is irreversible.
To delete a customer:
- Go to the customer's details page.
- Click the three-dot menu in the first section's header.
- Choose Delete from the dropdown.
- In the pop-up, enter the customer's email and click Delete.