Manage Payments
Learn how to manage an order's payment in the vendor dashboard, including capturing and refunding payments.
On this page
In this guide, you'll learn how to manage an order's payment, including capturing and refunding the payment.
Overview
When a customer places an order, their payment is authorized by the payment provider they've chosen. You can manage an order's payment by capturing it, refunding it, or handling outstanding amounts.
Order Payment Statuses
At the top of the order details page, you can see the payment status of the order. The payment status can be one of the following:
| Status | Description |
|---|---|
| Not paid | The order has not been paid yet. |
| Authorized | The payment has been authorized but not captured. |
| Partially authorized | Part of the order's payment has been authorized. |
| Awaiting | The payment is awaiting completion. |
| Captured | The payment has been captured successfully. |
| Partially captured | Part of the order's payment has been captured. |
| Partially refunded | Part of the captured payment has been refunded. |
| Refunded | The captured payment has been fully refunded. |
| Canceled | The payment was canceled. |
| Requires action | Additional action is required from the customer or payment provider. |
Capture Payment
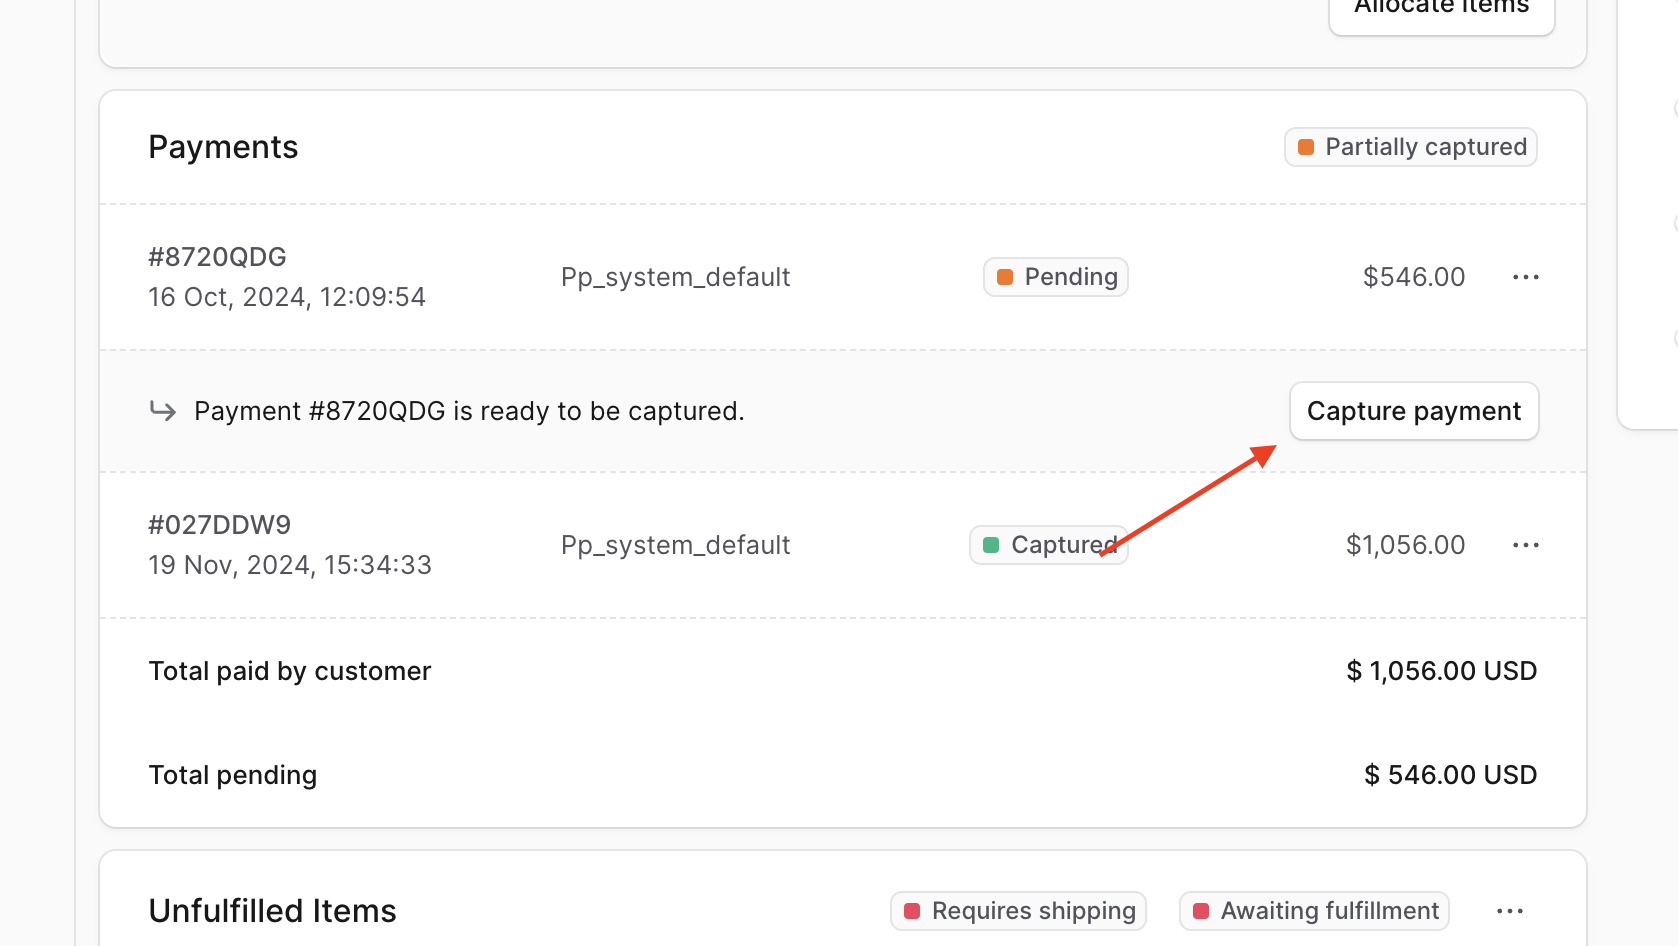
Unless the payment provider that the customer chose is configured to automatically capture an order's payment, you need to manually capture the payment.
Capturing an order's payment triggers its processing with the chosen payment provider, such as Stripe.
If you're unsure whether your payment provider is configured to automatically capture payments, contact your technical team to review the integrated payment service.
To capture an order's payment:
- Open the order's details page.
- Scroll to the Payments section.
- Click Capture Payment.
- Confirm capturing the payment by clicking Confirm in the pop-up.
Refund Payment
You can refund a payment either partially or in full. This can be done for various reasons, such as when a customer returns an item or if there was an error in the order.
You can refund a captured payment directly from the order details page without needing to create a return or make an order change.
Refunding the payment triggers its processing with the chosen payment provider, such as Stripe.
Refunding payments is irreversible.
To refund an order's captured payment:
- Open the order's details page.
- Scroll to the Payments section.
- Click the three-dot menu at the end of the payment to refund.
- Choose Refund from the dropdown.
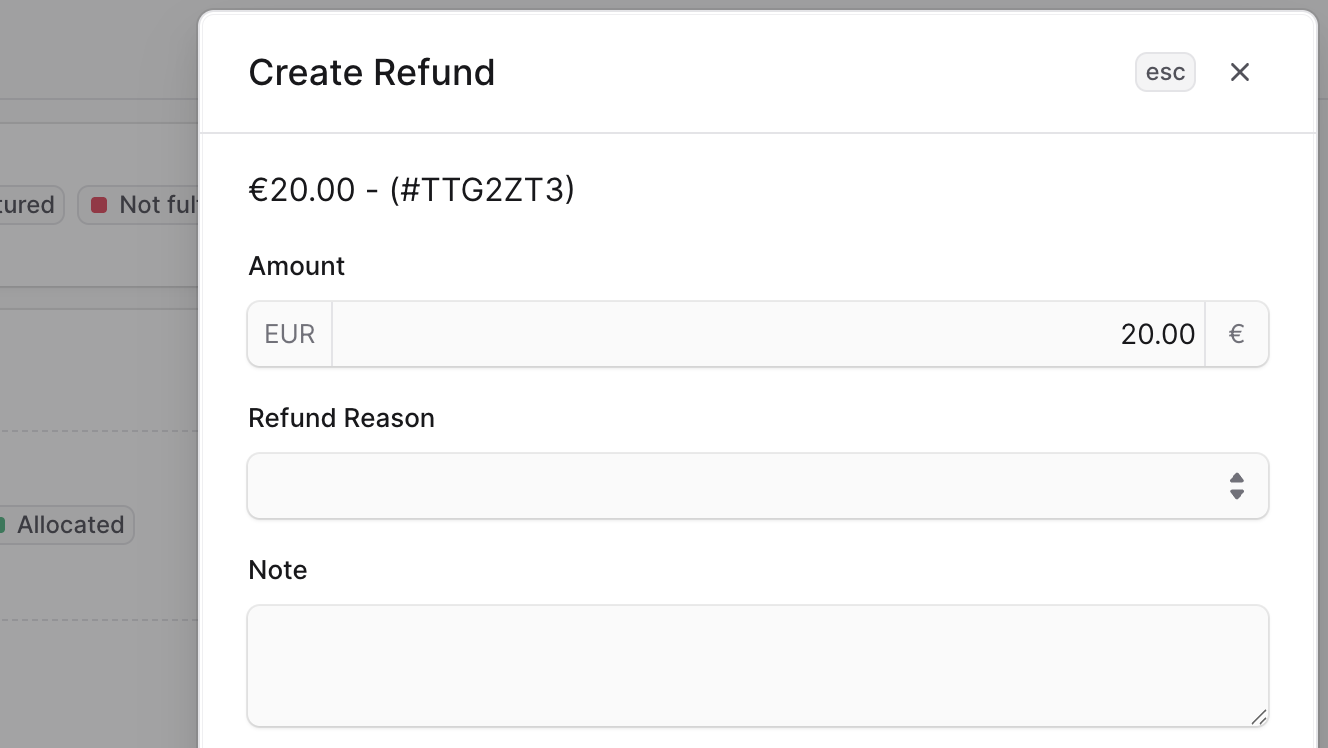
- In the side window that opens, fill out the following fields:
- Settlement type: Choose how to refund the payment:
- Payment method: Refund the payment using the same payment method the customer used for the order. This is the default option.
- Store credit: Refund the payment to the customer's store credit account. The customer can then use the store credit balance for future purchases. You can only choose this option if the customer is a registered customer.
- Amount: Enter the amount to refund.
- Refund Reason: Select a reason for the refund from the dropdown. You can manage refund reasons in Settings.
- This field doesn't show if you selected to refund to store credit.
- Note: Enter a note that the customer can see in the notification they receive.
- This field doesn't show if you selected to refund to store credit.
- Settlement type: Choose how to refund the payment:
- Once you're done, click Save.
Once the payment is refunded, the customer will receive a notification about the refund and you can view the refund as part of the order's activity.
Handling Positive Outstanding Amounts
An order may have a positive outstanding amount either after making changes to it, or if it was created as a draft order.
A positive outstanding amount indicates that the customer needs to pay an additional amount to complete the order.
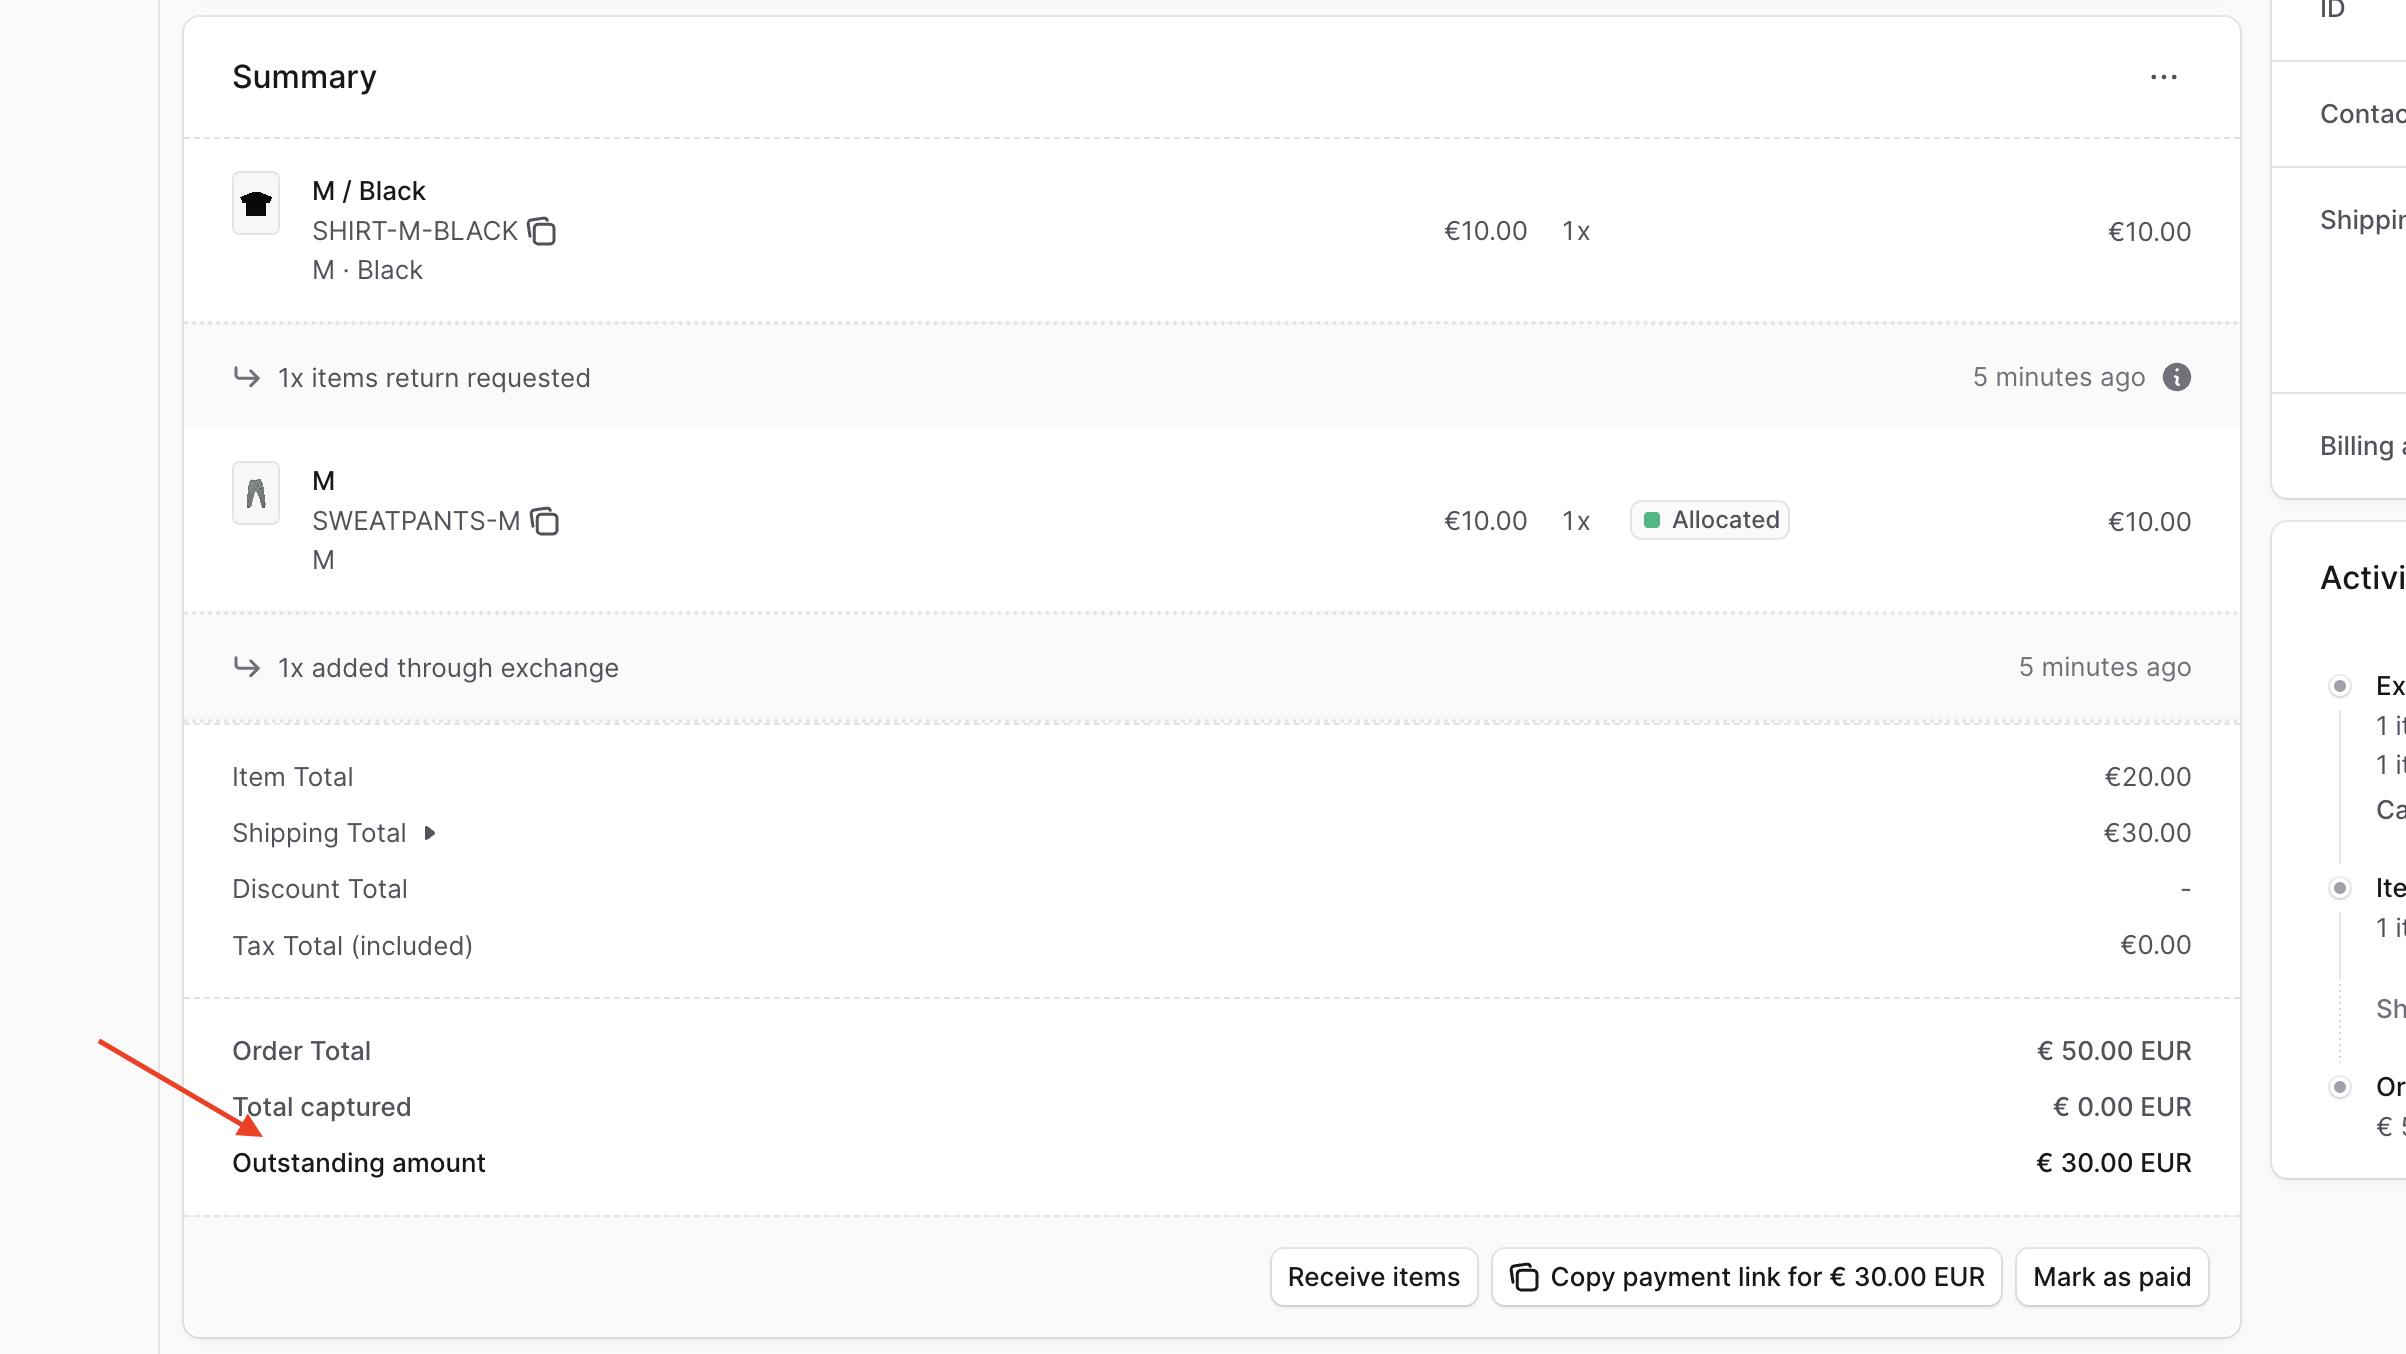
You can handle it by either:
Mark Outstanding Amount as Paid
By marking a positive outstanding amount as paid, you're capturing the payment without processing it through the associated payment provider. Instead, you handle capturing the payment outside of the vendor dashboard.
To mark a positive outstanding amount as paid:
- Open the order's details page.
- In the Summary section, click Mark as paid.
- Confirm marking the payment as paid by clicking Confirm in the pop-up.
Copy Payment Link for Additional Payment
Another way you can handle a positive outstanding amount is by sharing a payment link with the customer to authorize the payment. The payment link is a link in the storefront that the customer can use to pay for the additional amount.
To copy a payment link for the additional payment:
- Open the order's details page.
- In the Summary section, click Copy payment link.
The link is then copied and you can share it with the customer to authorize the payment. Once authorized, you can then capture the payment.
If the payment link doesn't start with a domain or has a domain that doesn't match your storefront, contact your technical team to set up the storefront domain.