Manage Locations
Learn how to manage stock locations in the vendor dashboard.
On this page
In this guide, you'll learn how to manage stock locations using the vendor dashboard.
What is a Stock Location?
A location represents a physical stocking location, such as a warehouse. You can then manage inventory item quantities in those locations.
For each location, you can specify the sales channels it's associated with, the fulfillment providers available in that location, and the shipping options available from that location.
During checkout, a customer can only choose shipping options available from the location associated with the sales channel they're ordering from. After they place the order, items are fulfilled from the stock location associated with the order's sales channel.
Create Location
To create a stock location:
- Go to Settings → Locations & Shipping.
- Click Create in the main section's header.
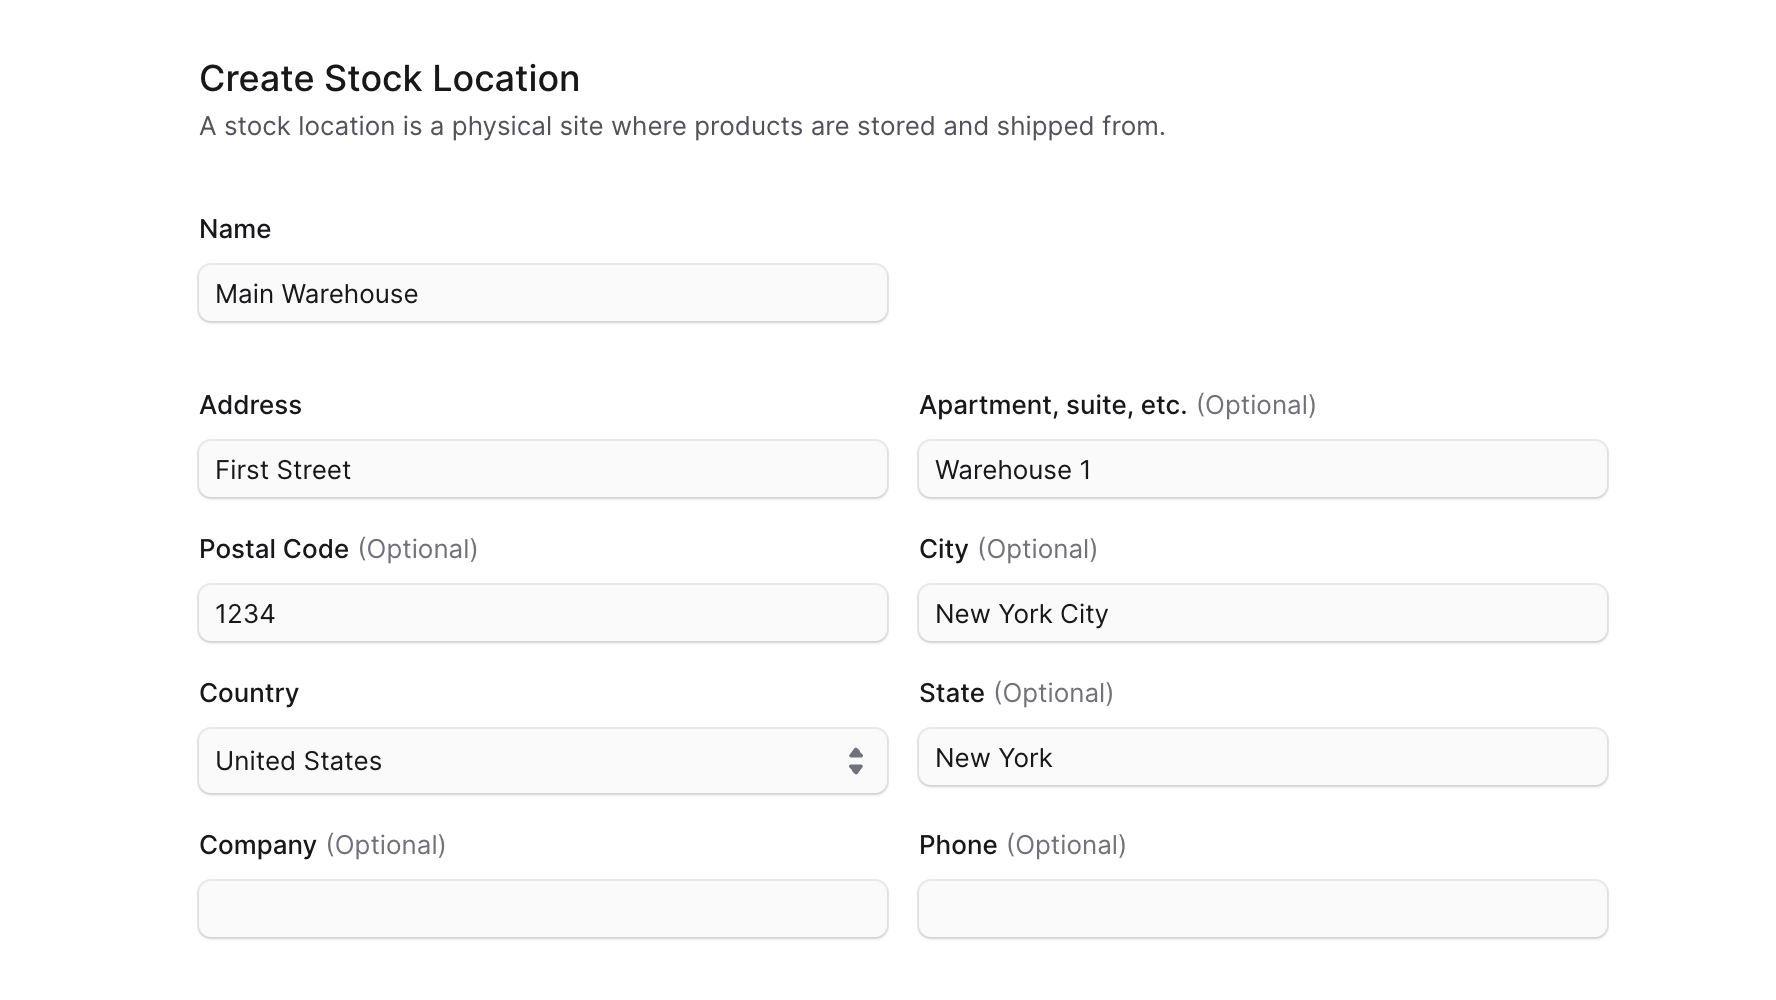
- In the form that opens:
- Enter the location's name, such as "Main Warehouse".
- Enter the address details. It's only required to enter an address line and choose a country.
- When you're done, click Save.
View Location Details
To view the details of a location:
- Go to Settings → Locations & Shipping.
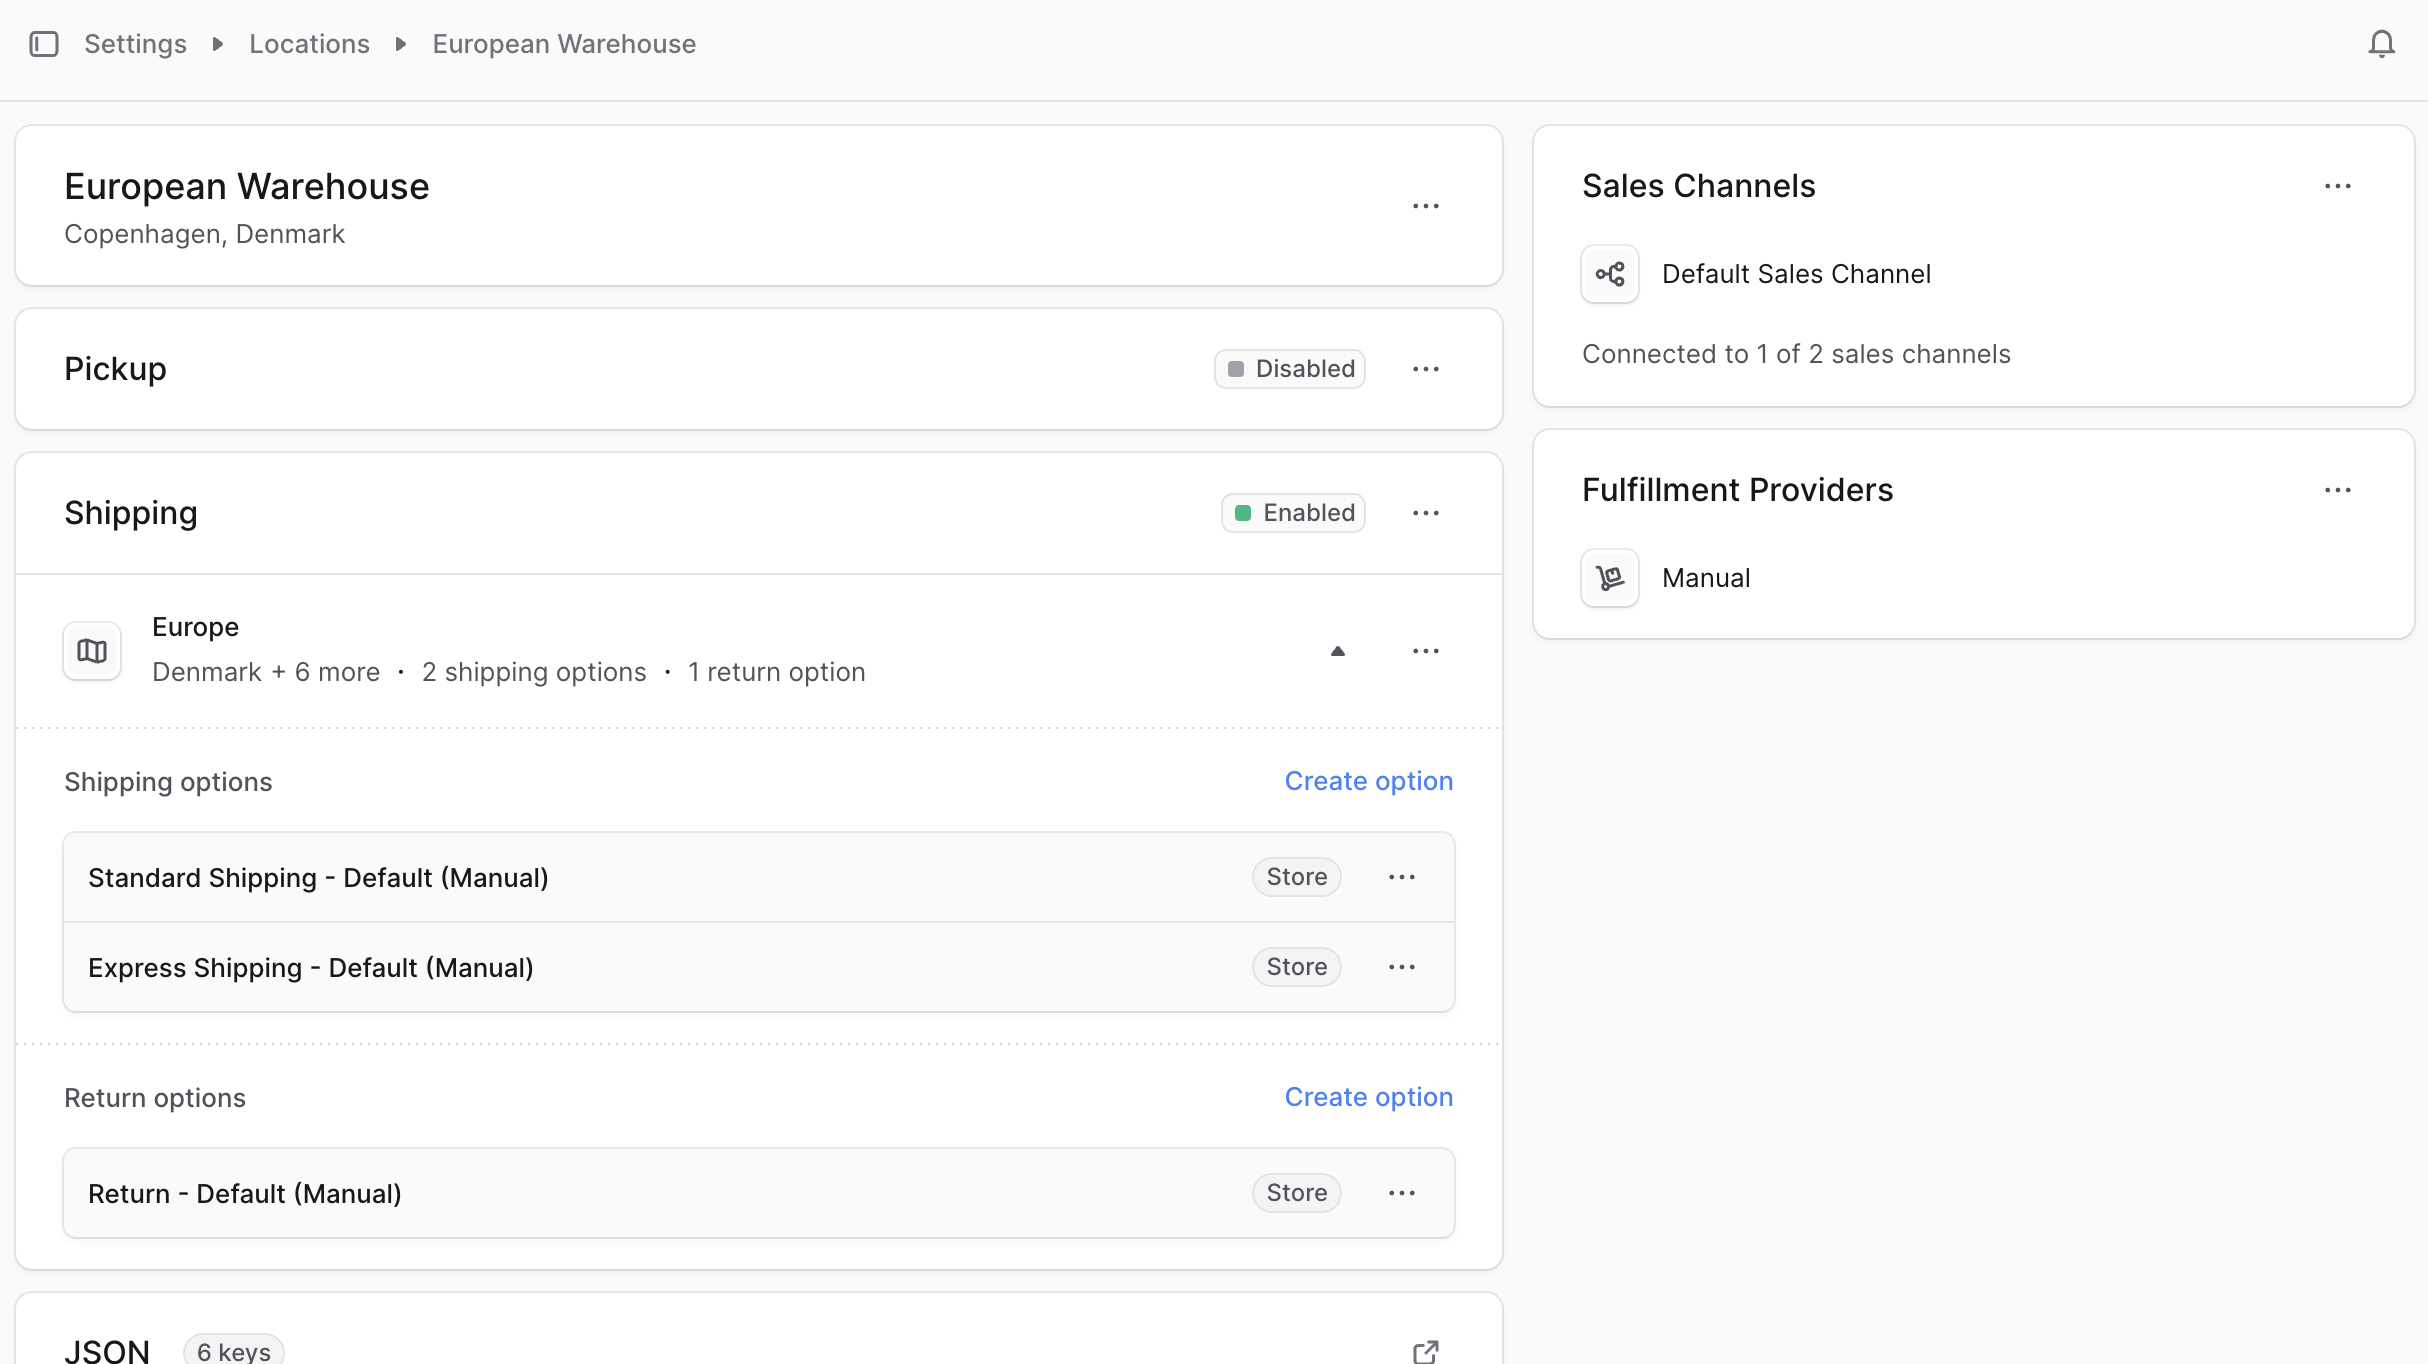
- Click the location you want to view.
This opens the location's details page where you can also manage the location.
Edit Location
To edit a stock location:
- Open the location's details page.
- Click the three-dot menu in the first section's header.
- Choose Edit from the dropdown.
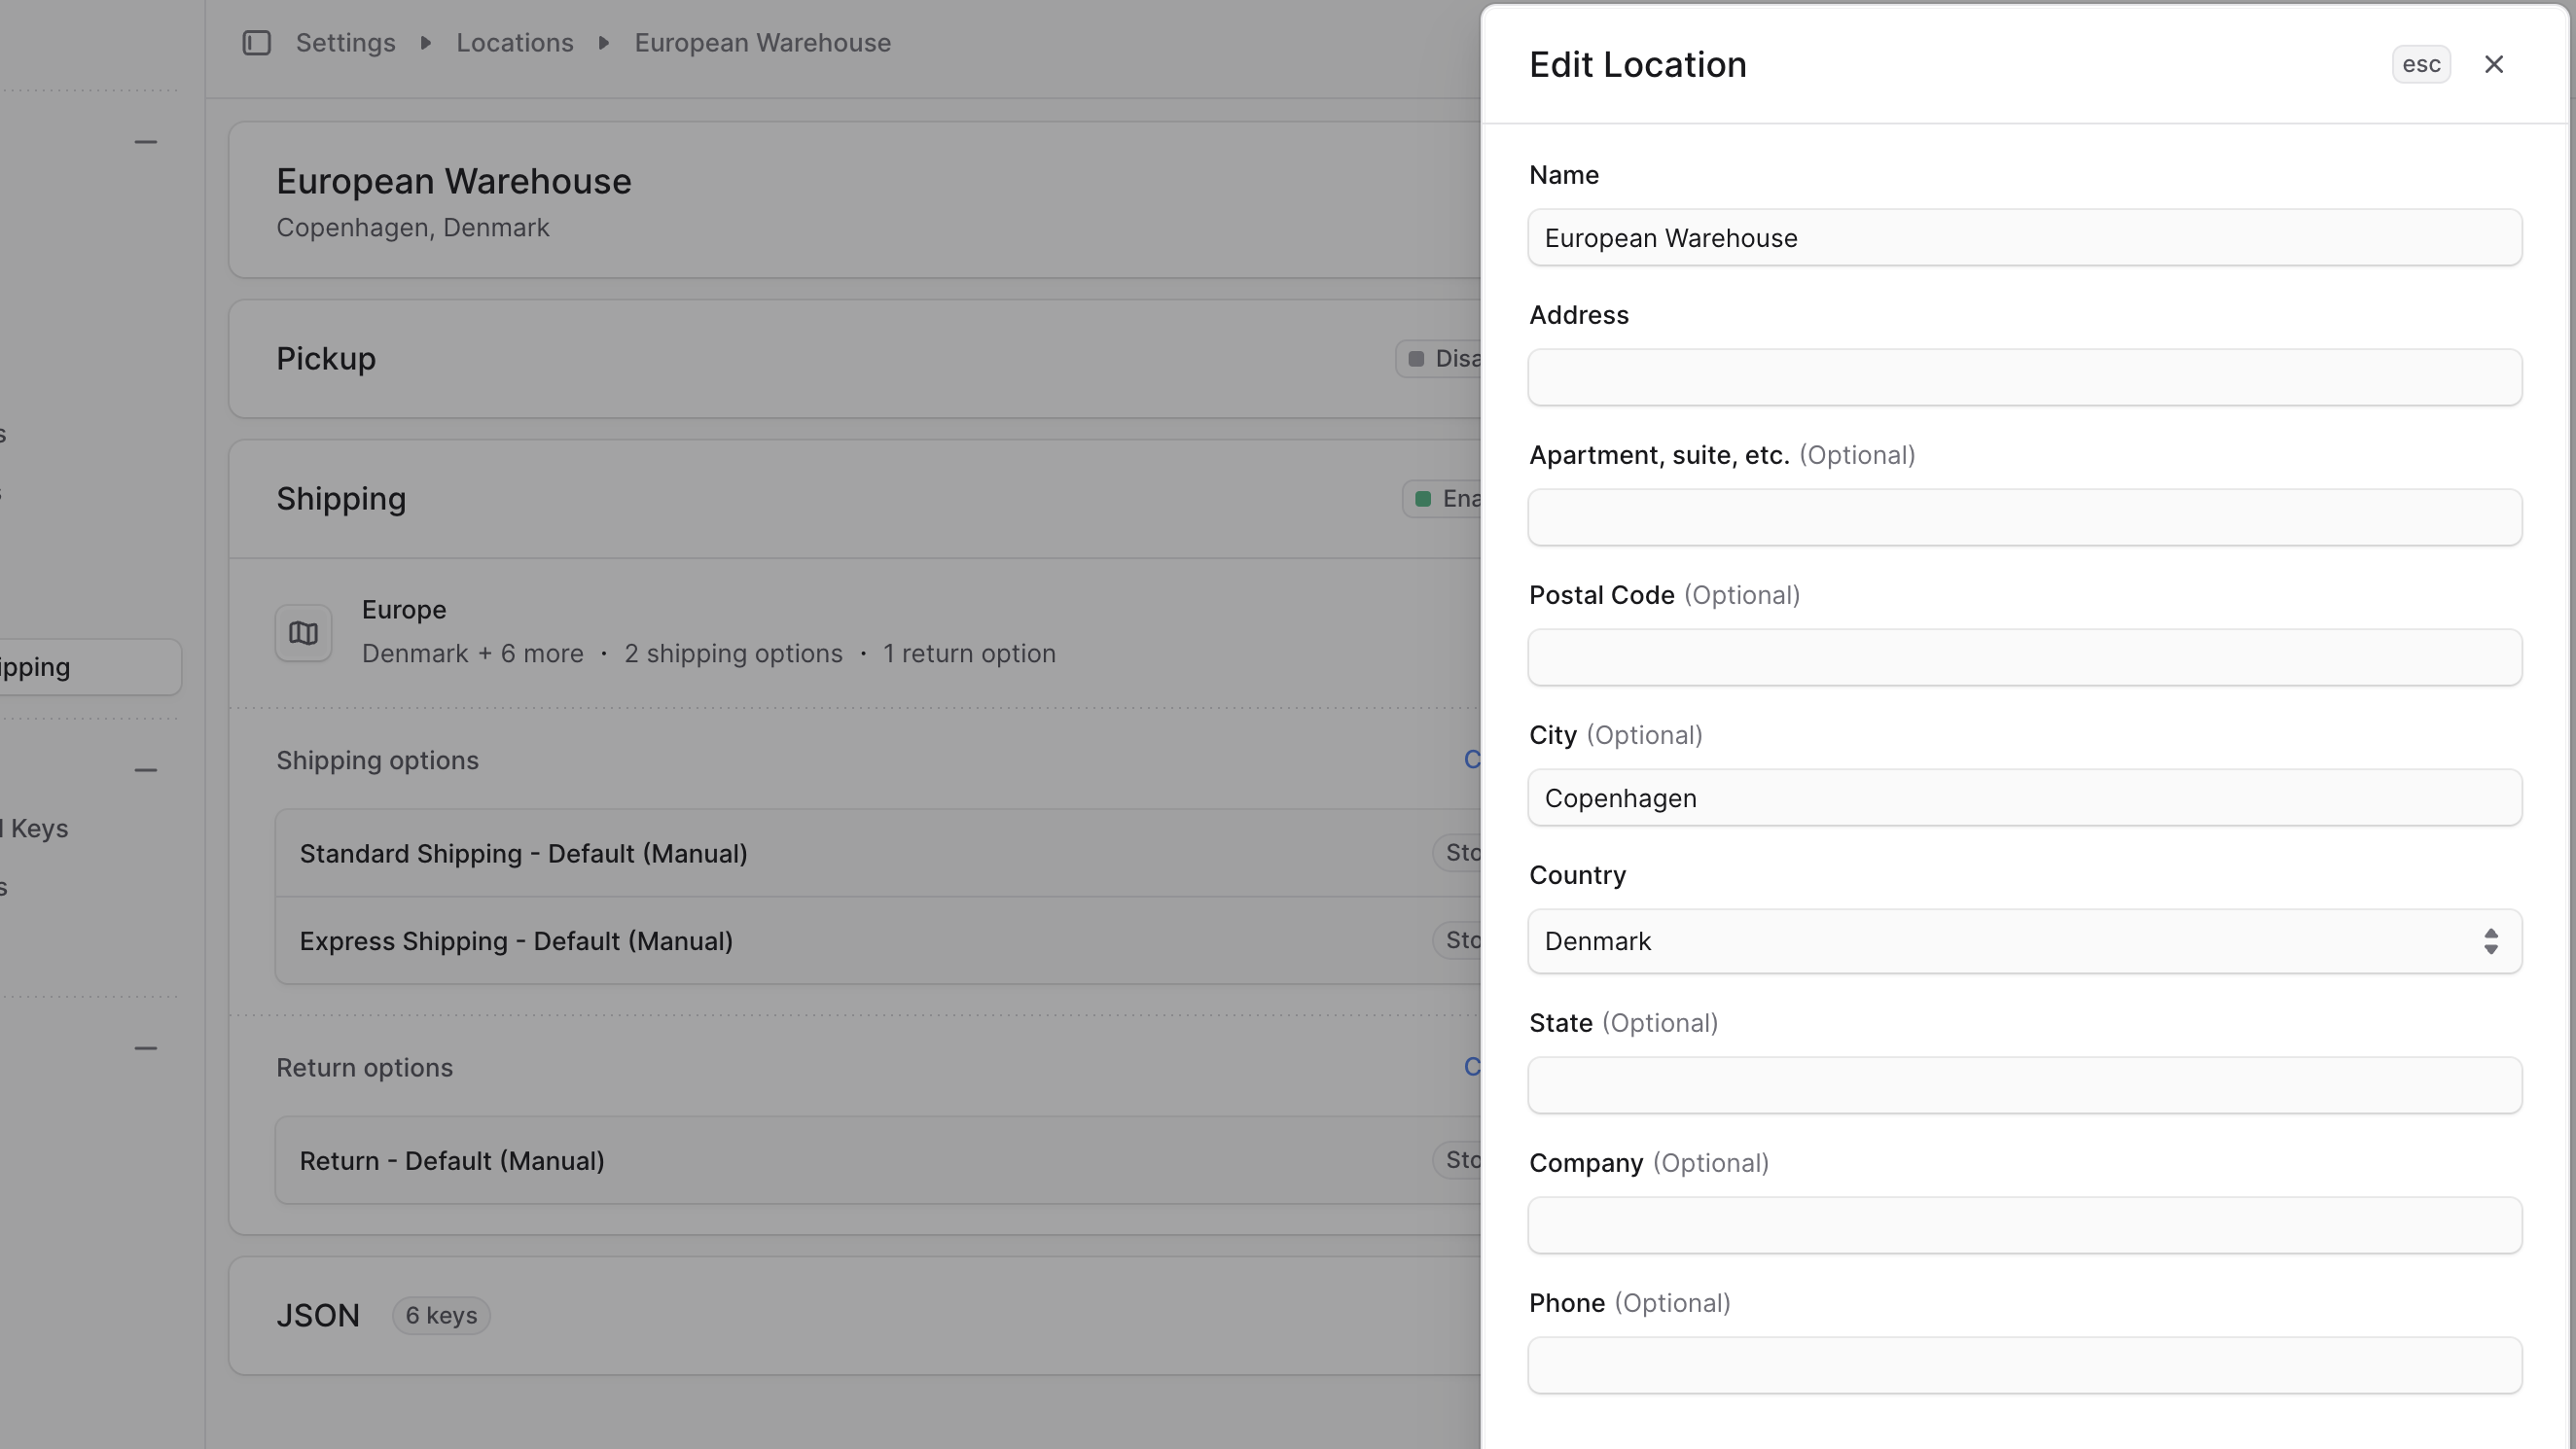
- In the side window that opens, edit the location's name and address details.
- When you're done, click Save.
Create Shipping Options
A location can have shipping options for pickup and shipping modes. You can manage these options from the location's details page.
Shipping options are organized by service zones in each shipping mode. A service zone is a geographical area where you can specify the shipping options available. For example, you can create a service zone for the United States and specify the shipping options available in the US.
To create a shipping option for either pickup or shipping, enable the pickup or shipping mode, create a service zone for that mode, and create the shipping option within that zone.
1. Enable Shipping Mode
By default, pickup and shipping are disabled in a location. To enable either:
- Go to the location's details page.
- Click the three-dot menu in the header of the Pickup or Shipping section.
- Choose Enable from the dropdown.
You can also disable the shipping mode by following the same steps.
2. Create Service Zone
To create a service zone for pickup or shipping:
- Go to the location's details page.
- Click the three-dot menu in the header of the Pickup or Shipping section.
- Choose Create service zone from the dropdown.
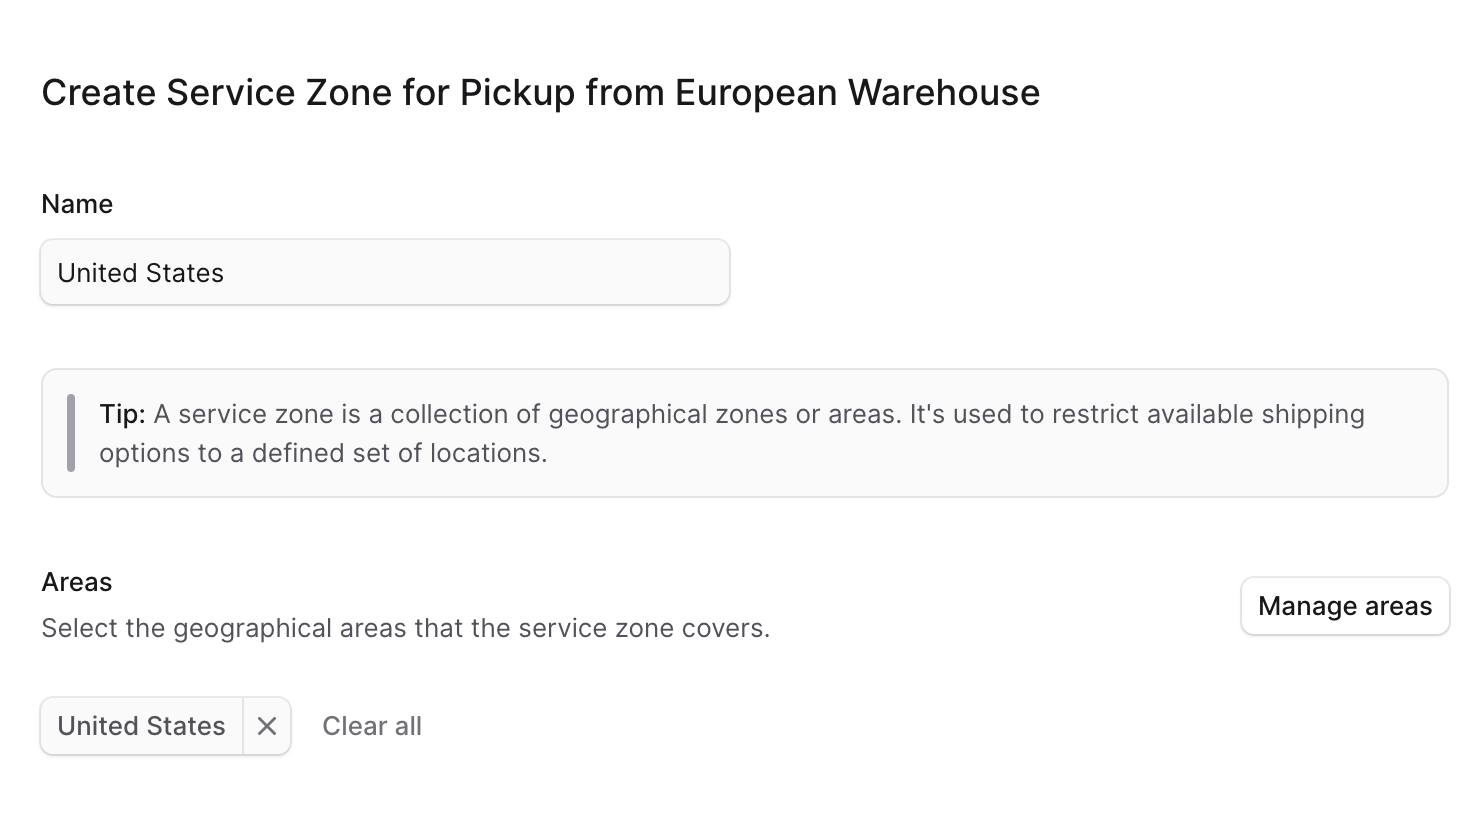
- In the form that opens:
- In Name, enter the name of the service zone. For example, "United States".
- Under Areas, choose the countries covered by this service zone:
- Click Manage areas.
- Check the countries to add to the service zone.
- Click Save.
- When you're done, click Save.
Learn how you can further manage this service zone in the Manage Service Zones section.
3. Create Shipping Options
You can add shipping options to the service zone you created. You can add a standard shipping option used during checkout, or a return shipping option used only to return items from the customer.
To create a shipping option:
- Go to the location's details page.
- In the Pickup or Shipping section, find the service zone you want to add the shipping option to.
- Click Create option next to Shipping options, Pickup options, or Return options, based on the type of shipping option you're creating.
- In the form that opens:
- If the shipping option isn't a pickup option, choose the price type. Choose Fixed for fixed pricing, or Calculated if the price should be calculated dynamically during checkout. Calculated prices are useful when using a third-party fulfillment provider that calculates prices dynamically.
- If you chose Fixed, you'll set the price in the next step of the form.
- If you choose Calculated and the fulfillment provider you choose doesn't support calculated prices, shipping option creation will fail.
- In Name, enter a name for the shipping option. Customers will see this option during checkout.
- In Shipping Profile, choose the shipping profile that this option can be used for. Only products belonging to this shipping profile can be shipped with this shipping option.
- In Shipping Option Type, choose the shipping option type that this option belongs to. Shipping option types are useful to group similar shipping options together, allowing you to apply promotions at a group level.
- In Fulfillment Provider, choose the fulfillment provider that will handle shipping orders using this option.
- If you don't find the fulfillment provider you're looking for, make sure it's added to the location.
- In Fulfillment Option, choose a fulfillment option from the fulfillment provider. For example, UPS may provide express or standard fulfillment options.
- If you're unsure which fulfillment option to choose, contact your technical team for assistance based on the integrated fulfillment service.
- If you don't want this shipping option to be used by customers during checkout, disable Enable in store. This is useful when creating a shipping option that's only used internally.
- If the shipping option isn't a pickup option, choose the price type. Choose Fixed for fixed pricing, or Calculated if the price should be calculated dynamically during checkout. Calculated prices are useful when using a third-party fulfillment provider that calculates prices dynamically.
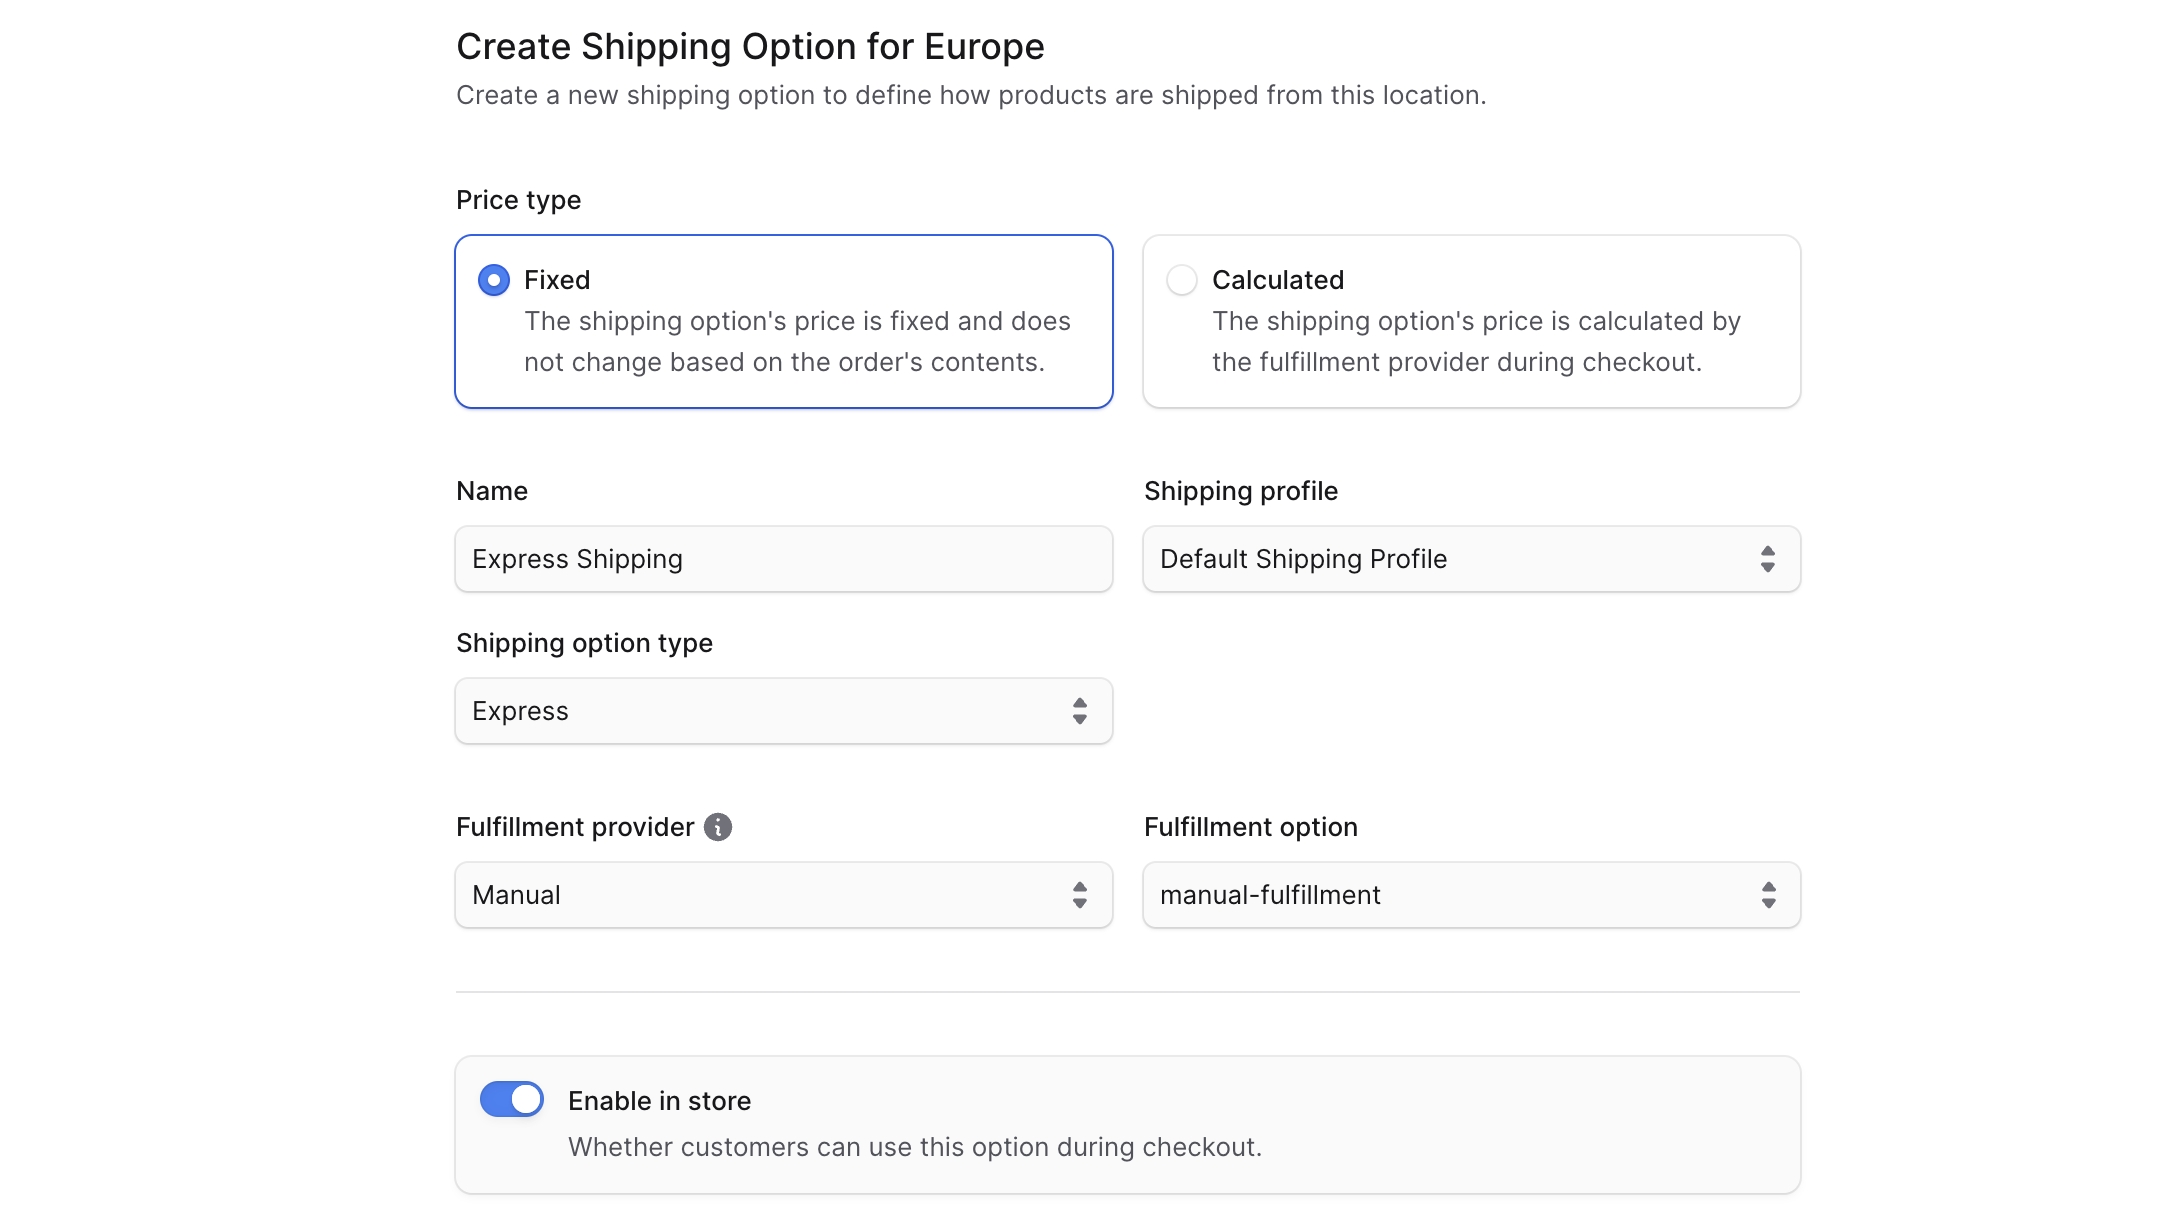
If you chose a Calculated price type, click Save to create the shipping option. Otherwise click Continue to proceed to the Prices step.
Fixed and Conditional Shipping Option Prices
In the Prices step, use the bulk editor to enter the shipping option's prices for every currency and region in your store.
- Price columns marked as tax-exclusive are tax-exclusive prices. Taxes are calculated during checkout and added to this price.
- Price columns marked as tax-inclusive are tax-inclusive prices. Taxes are calculated during checkout as part of this price.
Tax-inclusive pricing is configured in the currency's or region's settings.
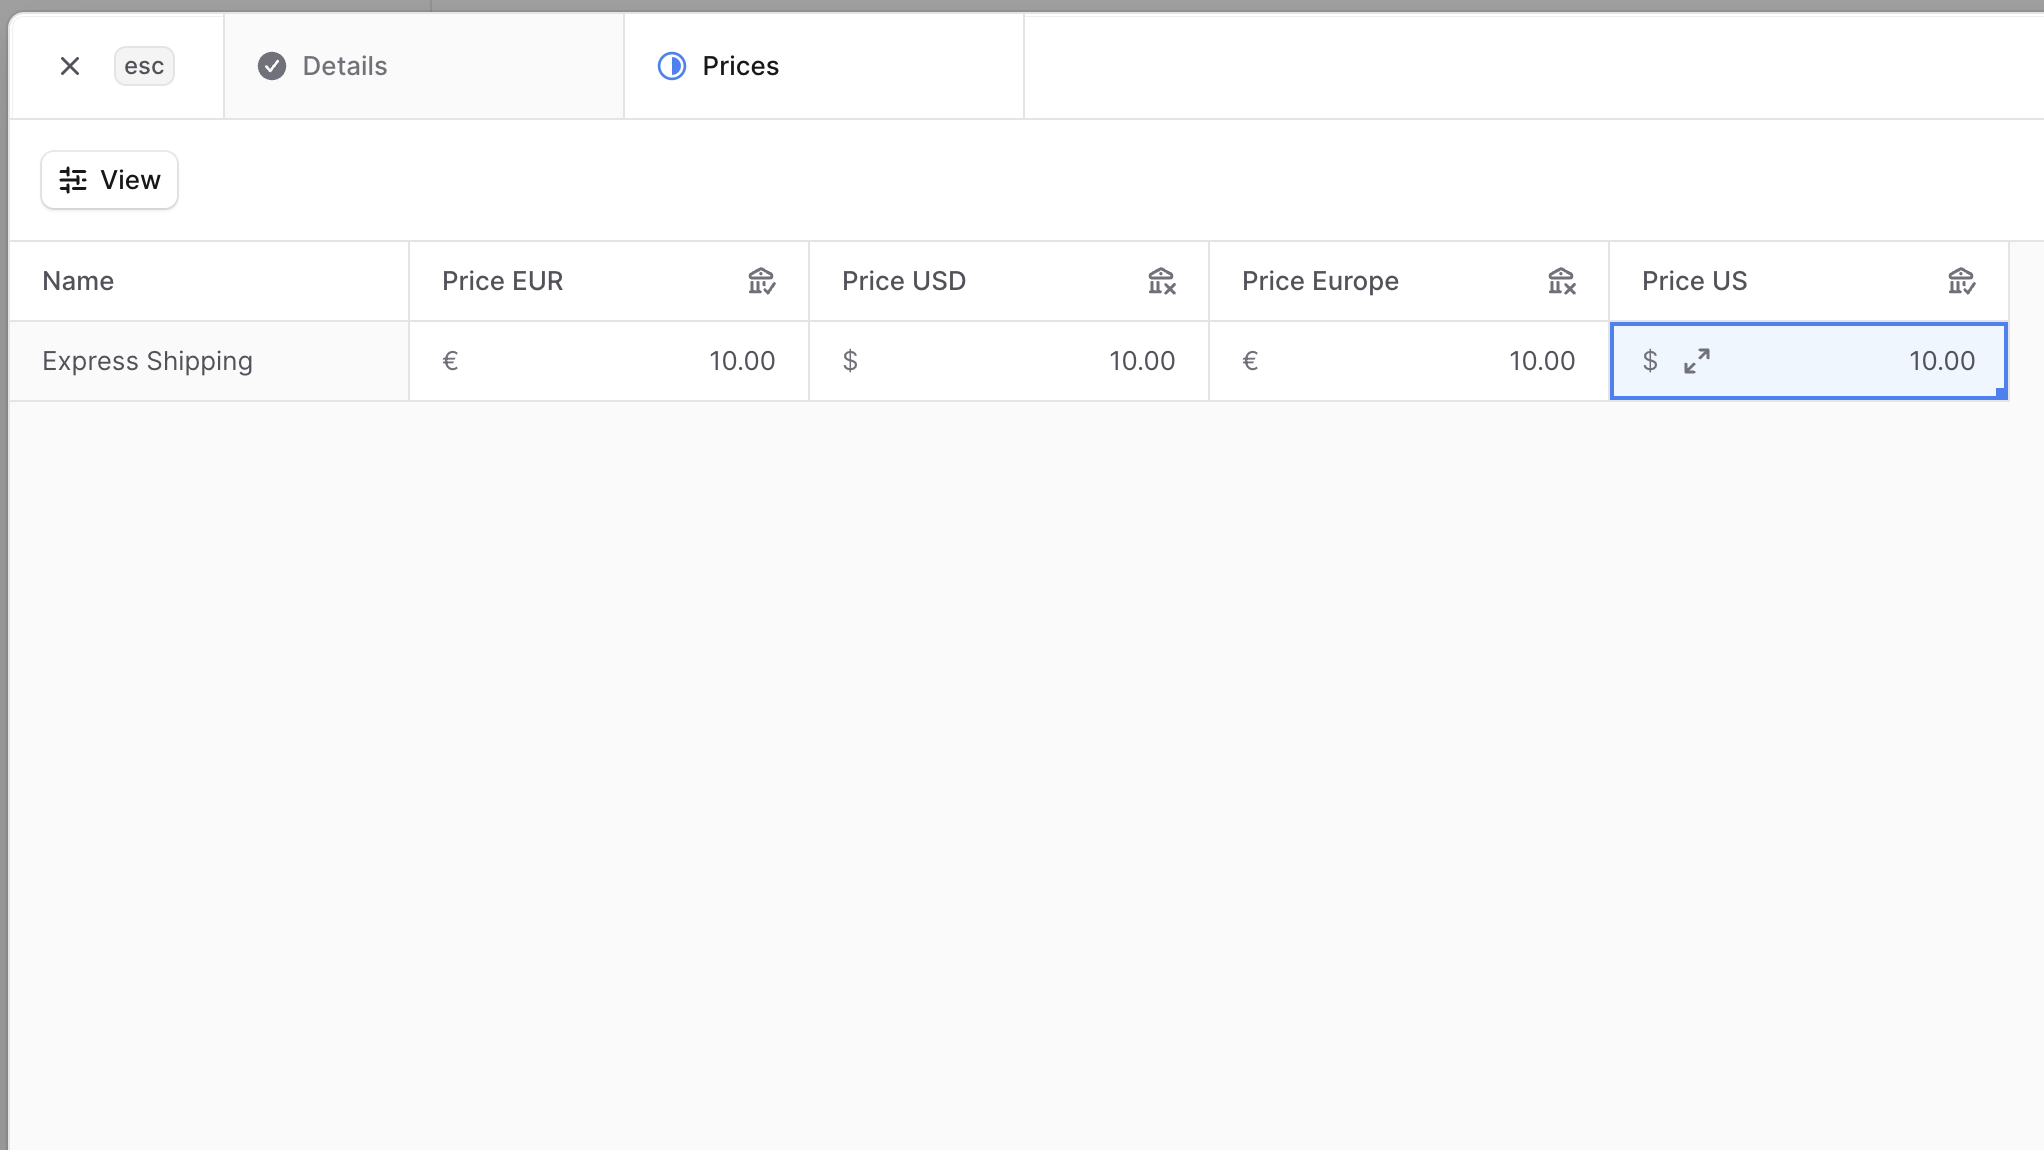
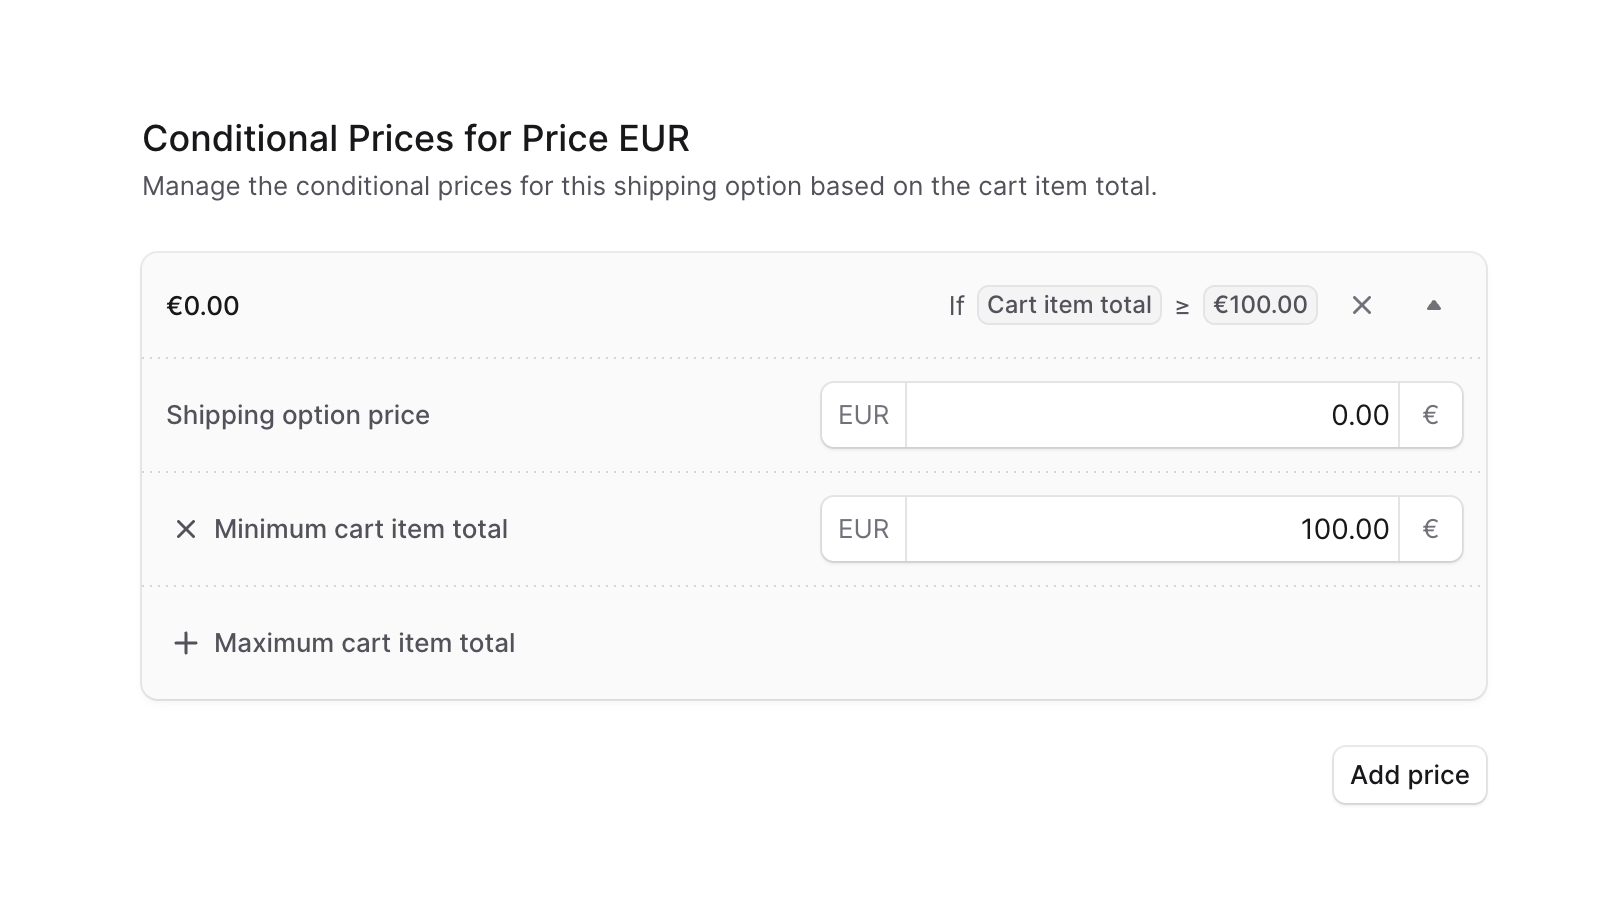
Shipping option prices can also be conditioned based on the cart's total. For example, you can make the shipping option free if the cart's total exceeds $100.
To set a conditioned price for the shipping option:
- Hover over a cell in the bulk editor for the currency or region you want to set the conditioned price for.
- Click the expand icon that appears to open the conditional pricing form.
- In the form that opens:
- A conditional pricing card appears. You can add another by clicking Add price.
- In Shipping option price, enter the price when this condition is satisfied.
- To set the minimum cart total required for this price to apply:
- Click + next to Minimum cart total.
- Enter the minimum cart total required for this price to apply.
- To set the maximum cart total required for this price to apply:
- Click + next to Maximum cart total.
- Enter the maximum cart total required for this price to apply.
- When you're done, click Save.
When you're done, click Save.
Learn how you can further manage the shipping option in the Manage Shipping Options section.
Manage Service Zones
You can manage service zones in pickup or shipping mode by creating, editing, or deleting them.
Edit Service Zone Details
To edit a service zone in a location:
- Go to the location's details page.
- In the Pickup or Shipping sections, find the service zone and click the three-dot menu next to it.
- Choose Edit from the dropdown.
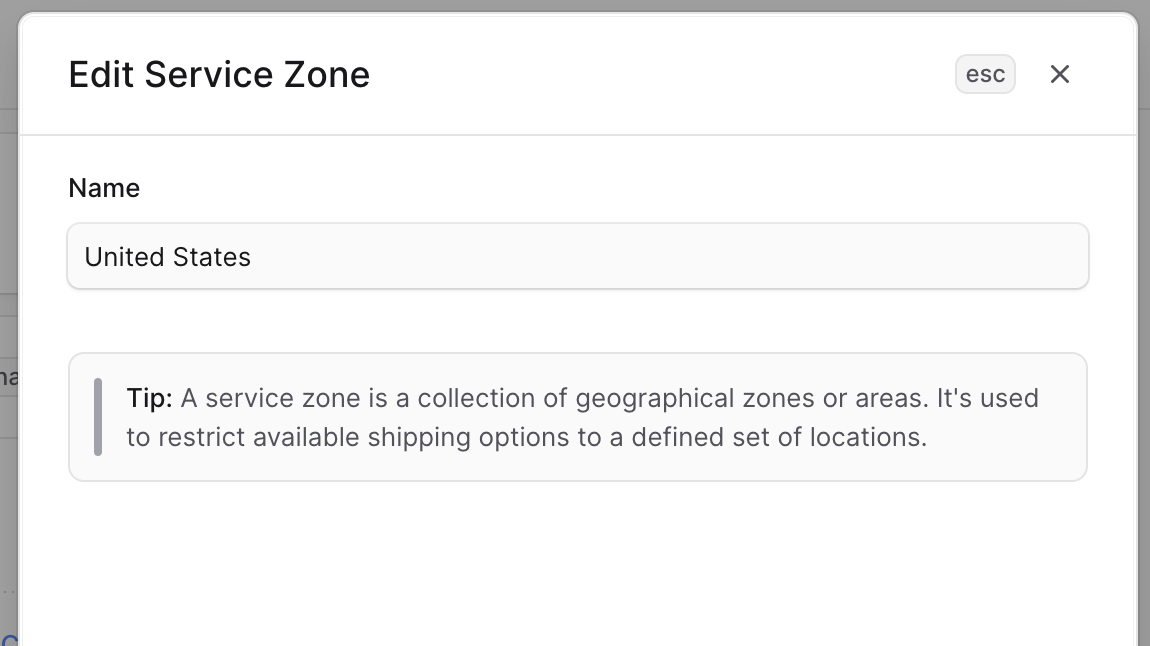
- In the side window that opens, edit the service zone's name.
- When you're done, click Save.
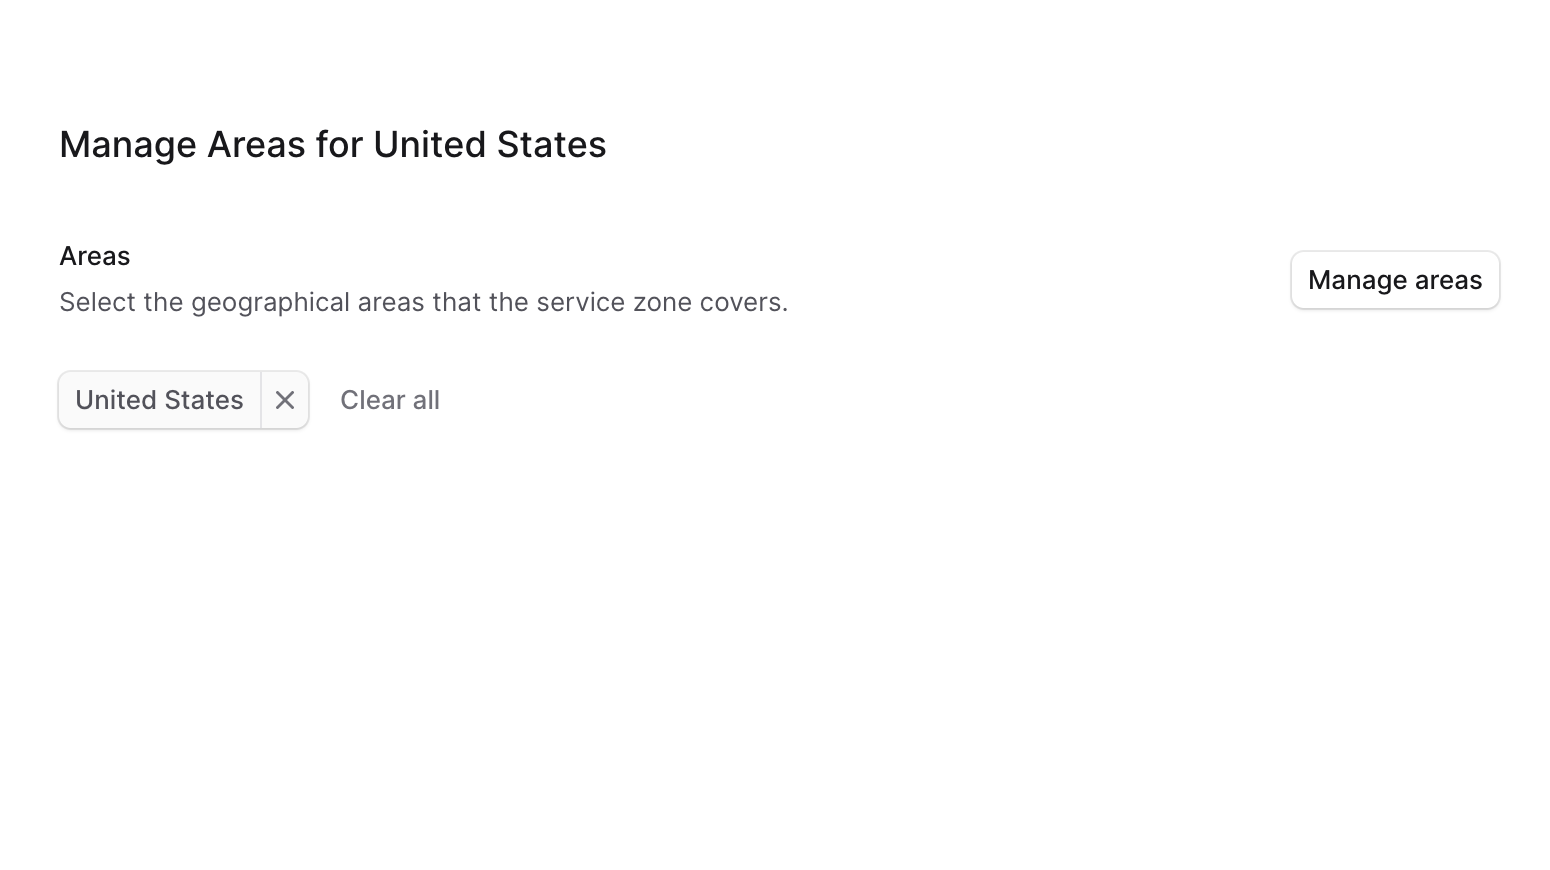
Manage Service Zone Areas
To manage the areas in a service zone:
- Go to the location's details page.
- In the Pickup or Shipping sections, find the service zone and click the three-dot menu next to it.
- Choose Manage areas from the dropdown.
- In the form that opens:
- Click Manage areas.
- Check countries to add to the service zone, and uncheck countries to remove from the service zone.
- Click Save.
- When you're done, click Save.
Delete Service Zone
Deleting a service zone is irreversible. It deletes all shipping options in the service zone.
To delete a service zone:
- Go to the location's details page.
- In the Pickup or Shipping sections, find the service zone and click the three-dot menu next to it.
- Choose Delete from the dropdown.
- Confirm by clicking Delete in the pop-up.
Manage Shipping Options
You can manage shipping options in pickup and shipping modes by creating, editing, or deleting them.
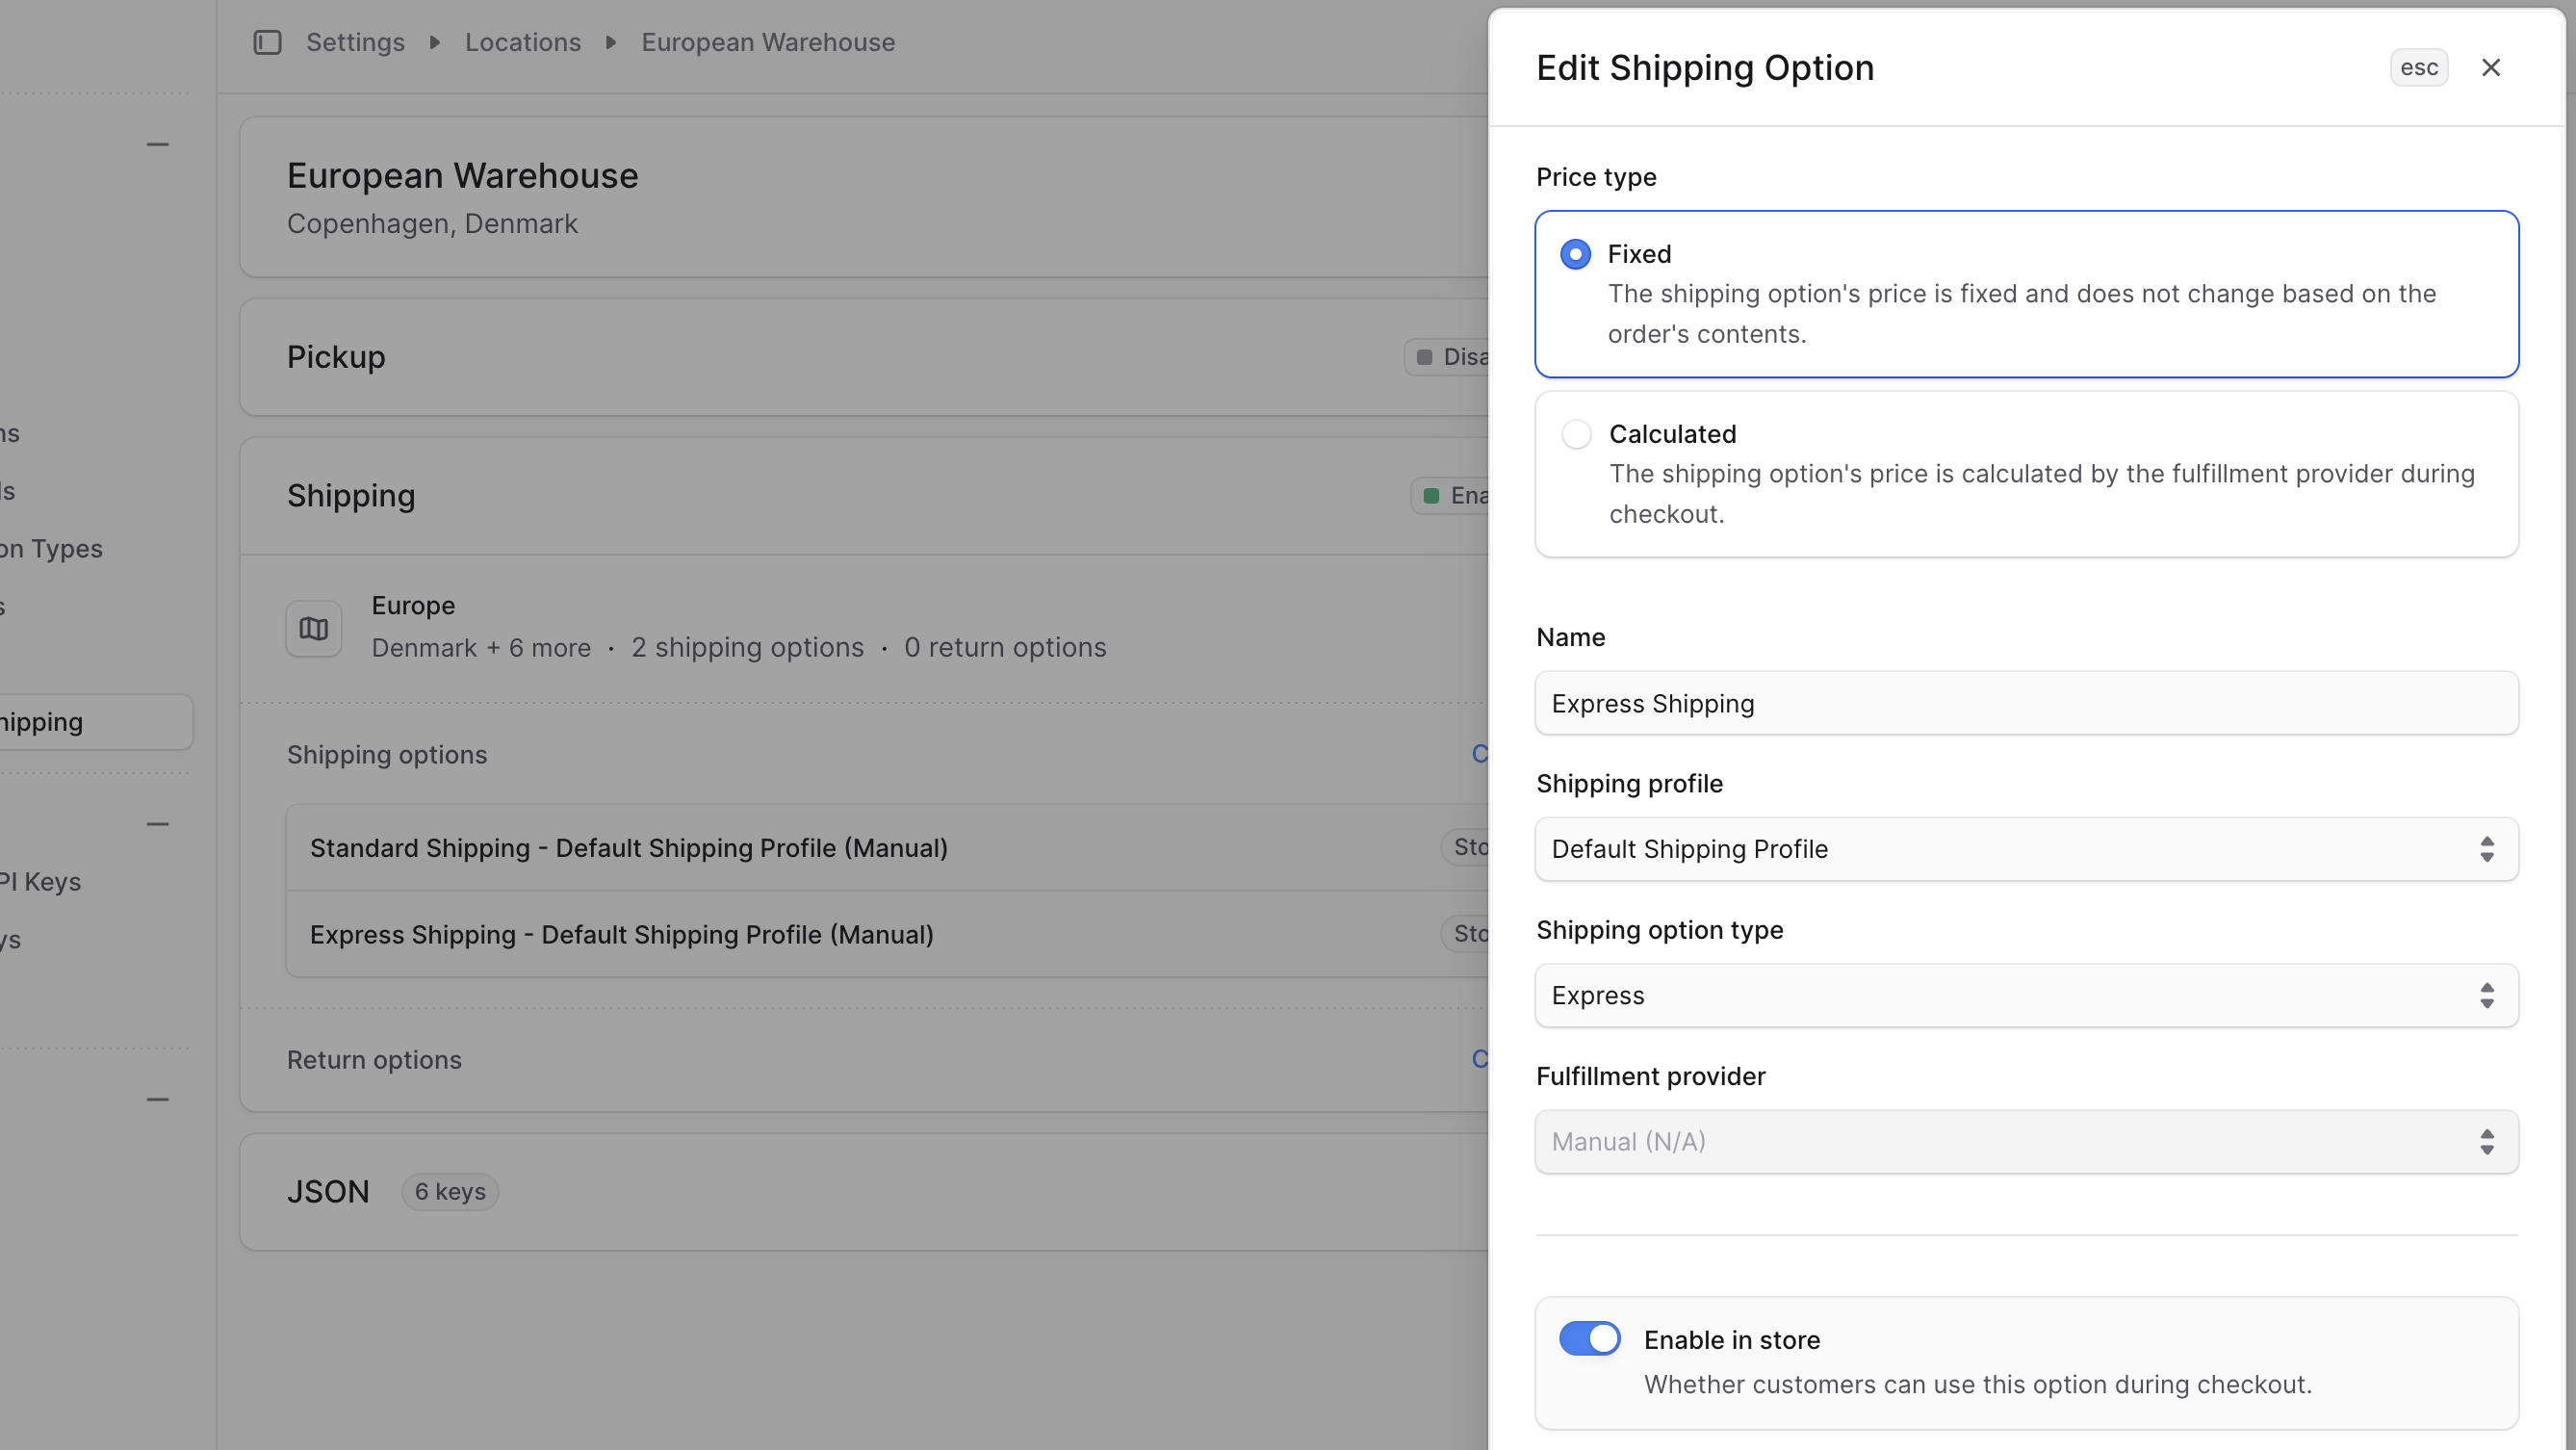
Edit Shipping Option Details
To edit a shipping option's details:
- Go to the location's details page.
- In the Pickup or Shipping sections, find the shipping option and click the three-dot menu next to it.
- Choose Edit option from the dropdown.
- In the side window that opens, edit the shipping option's price type, name, shipping profile, shipping option type, and whether it's enabled in store for customers to use.
- When you're done, click Save.
You can't edit a shipping option's fulfillment provider or fulfillment option after its creation.
Edit Shipping Option Prices
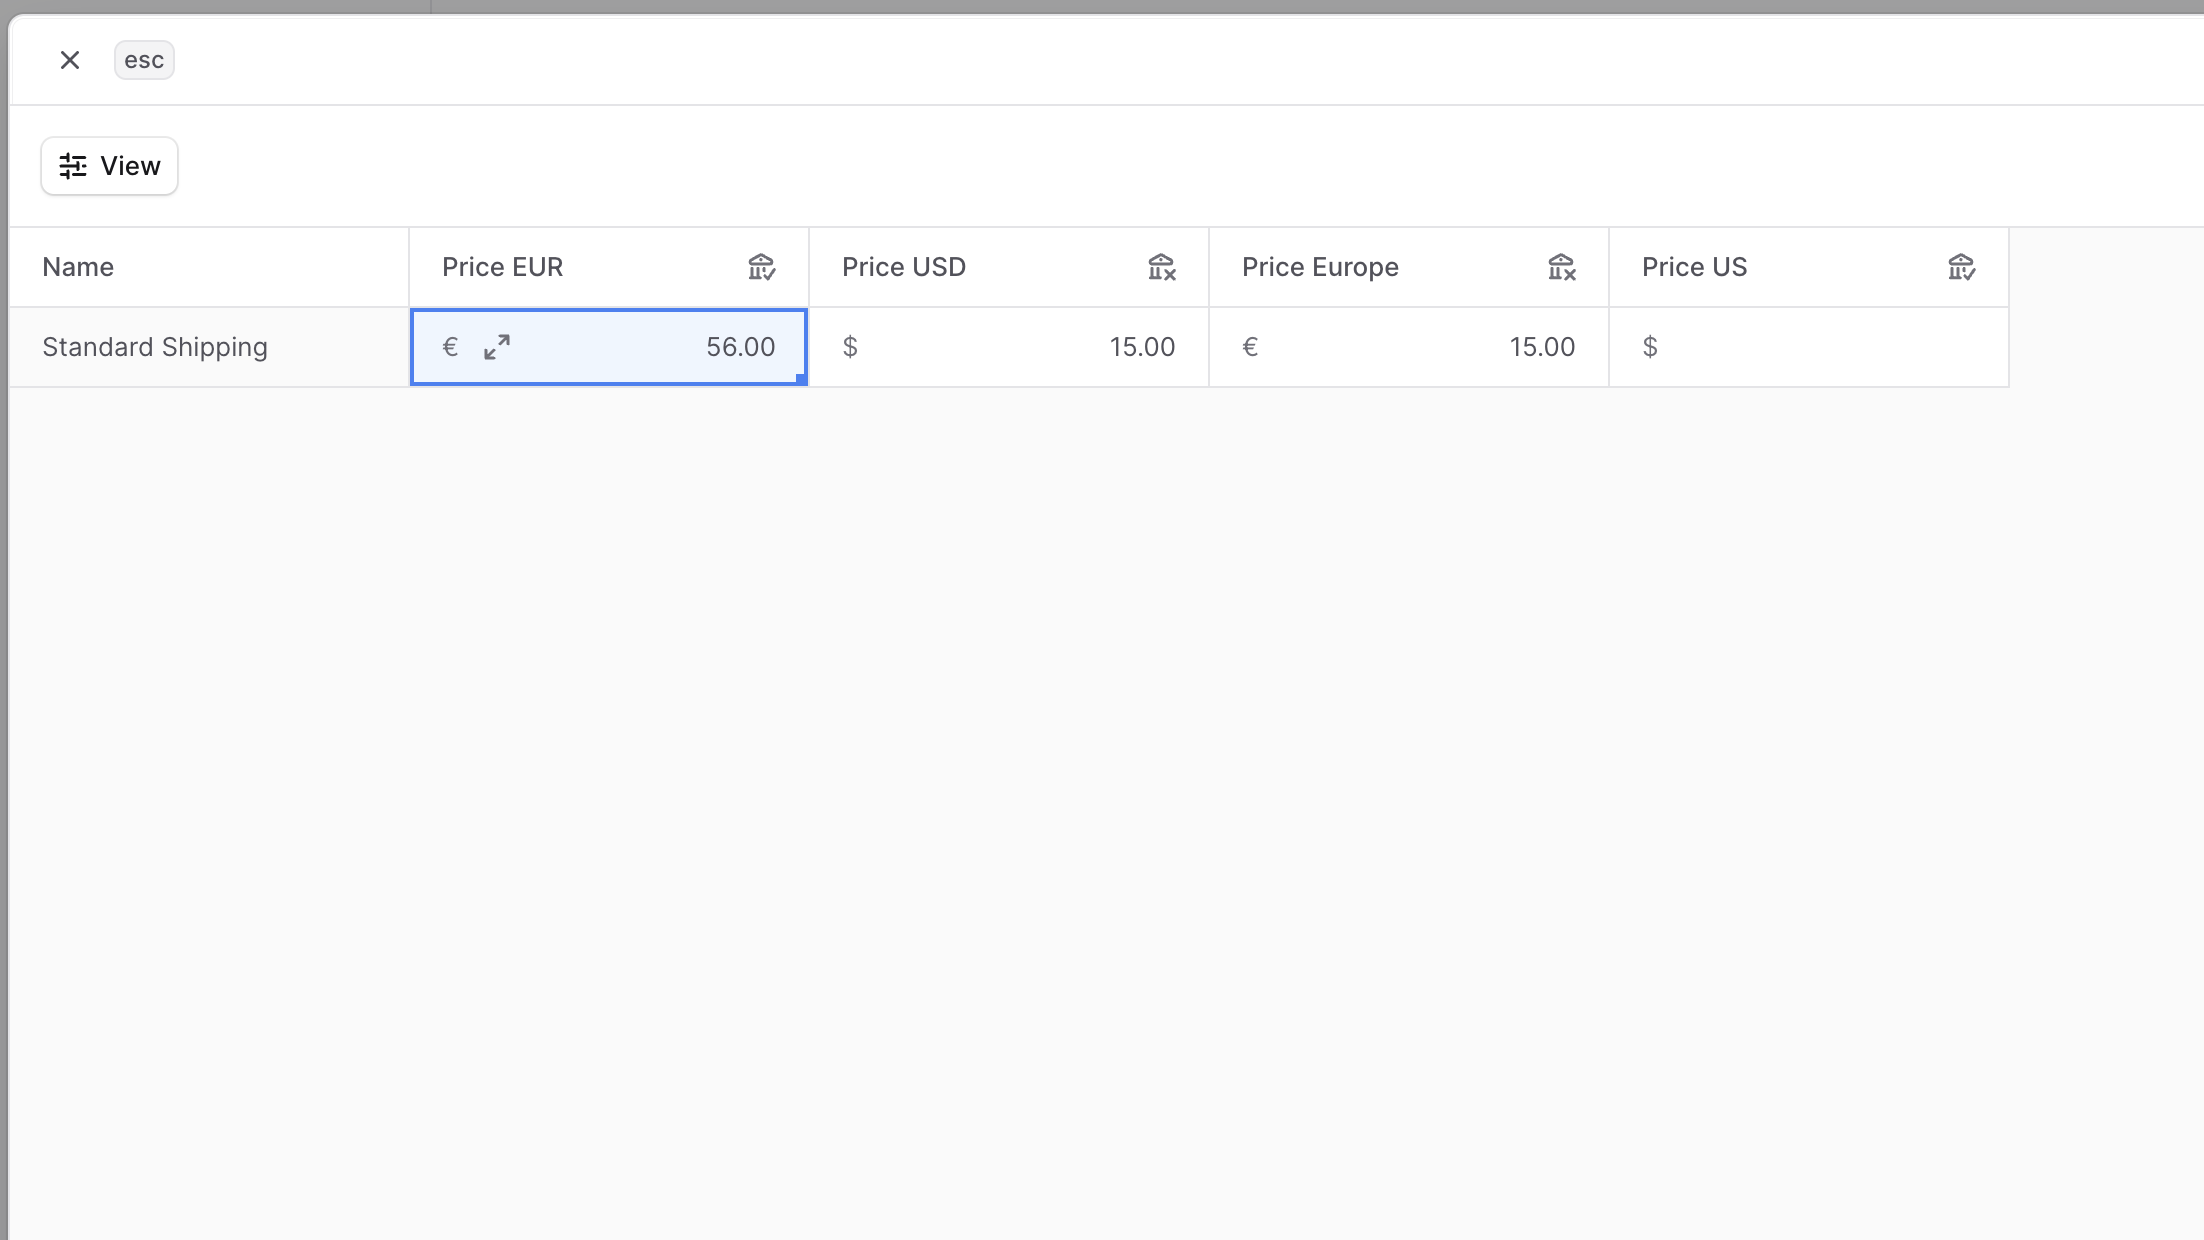
To edit the prices of shipping options whose price type is Fixed:
- Go to the location's details page.
- In the Pickup or Shipping sections, find the shipping option and click the three-dot menu next to it.
- Choose Edit prices from the dropdown.
- In the bulk editor that opens, edit the shipping option's price for every currency and region in your store.
- Refer to Fixed and Conditional Shipping Option Prices to set a conditional price for the shipping option.
- When you're done, click Save.
- Price columns marked as tax-exclusive are tax-exclusive prices. Taxes are calculated during checkout and added to this price.
- Price columns marked as tax-inclusive are tax-inclusive prices. Taxes are calculated during checkout as part of this price.
Tax-inclusive pricing is configured in the currency's or region's settings.
Delete Shipping Option
Deleting a shipping option is irreversible.
To delete a shipping option:
- Go to the location's details page.
- In the Pickup or Shipping sections, find the shipping option and click the three-dot menu next to it.
- Choose Delete from the dropdown.
- Confirm by entering its name in the pop-up and clicking Delete.
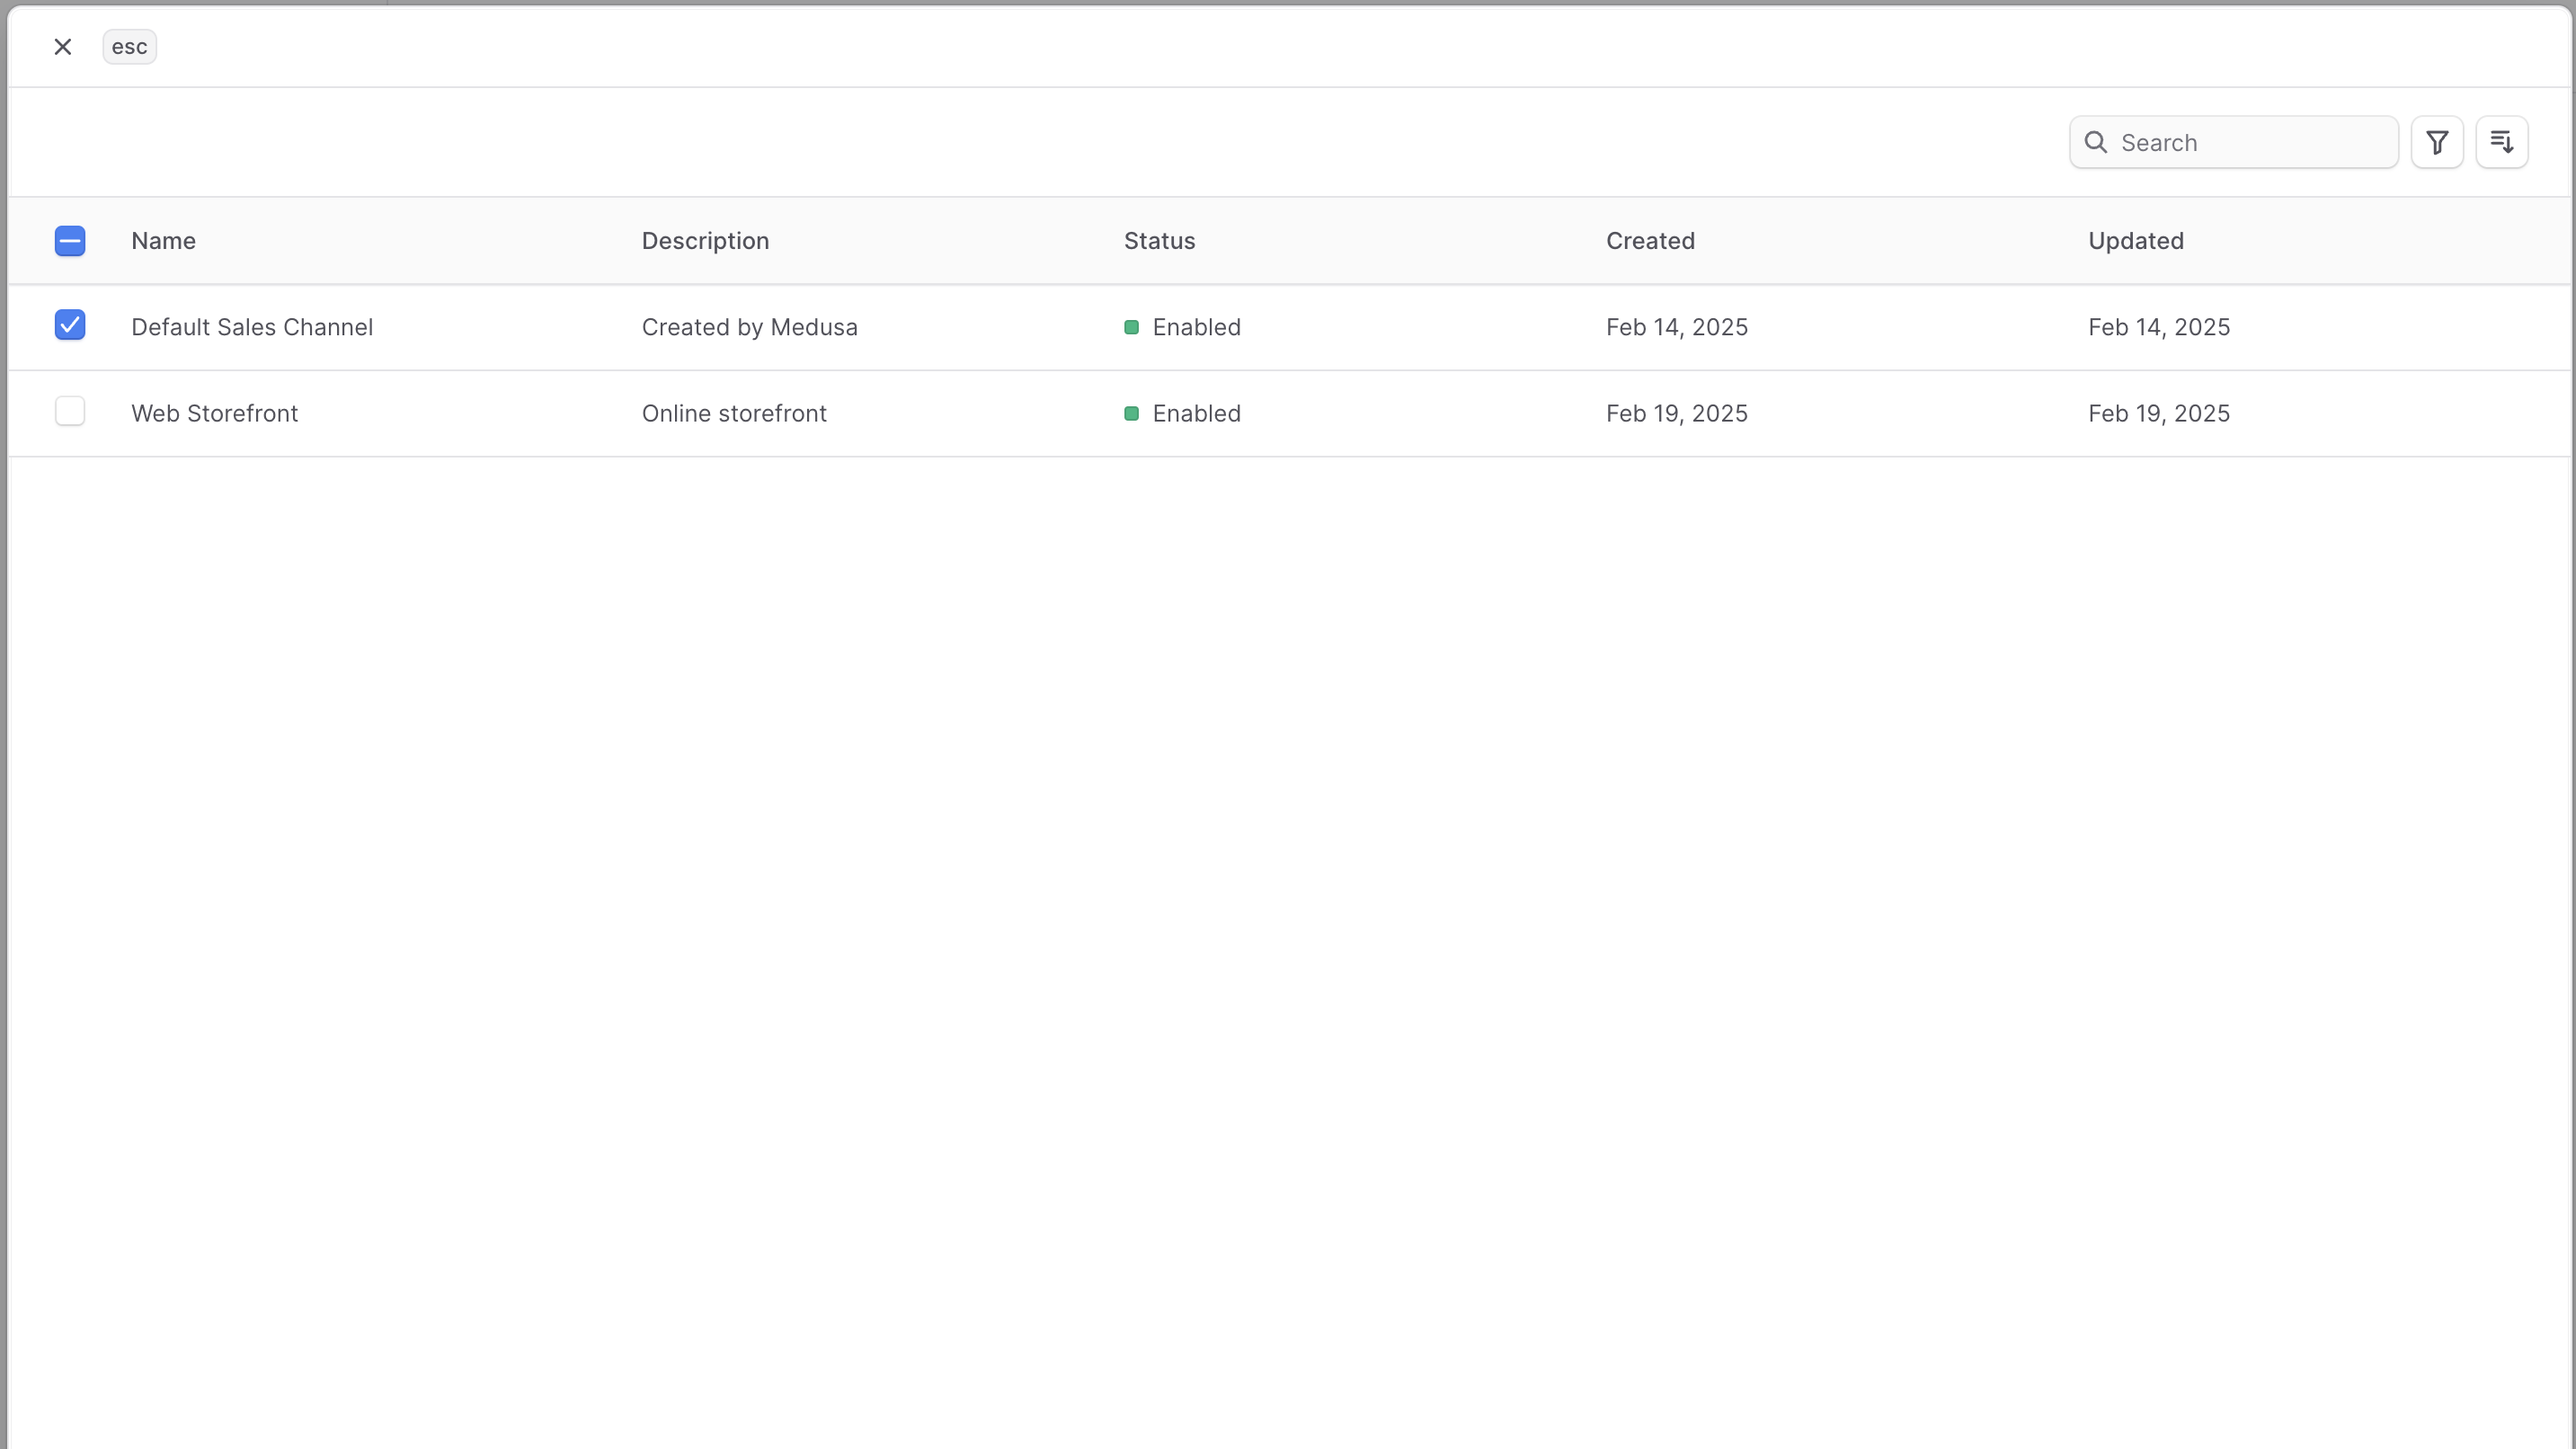
Change Associated Sales Channels
To change the sales channels associated with a location:
- Go to the location's details page.
- Click the three-dot menu in the header of the Sales Channels section.
- Choose Edit from the dropdown.
- In the list that opens, select the sales channels to associate with the location, or unselect the ones you want to remove.
- When you're done, click Save.
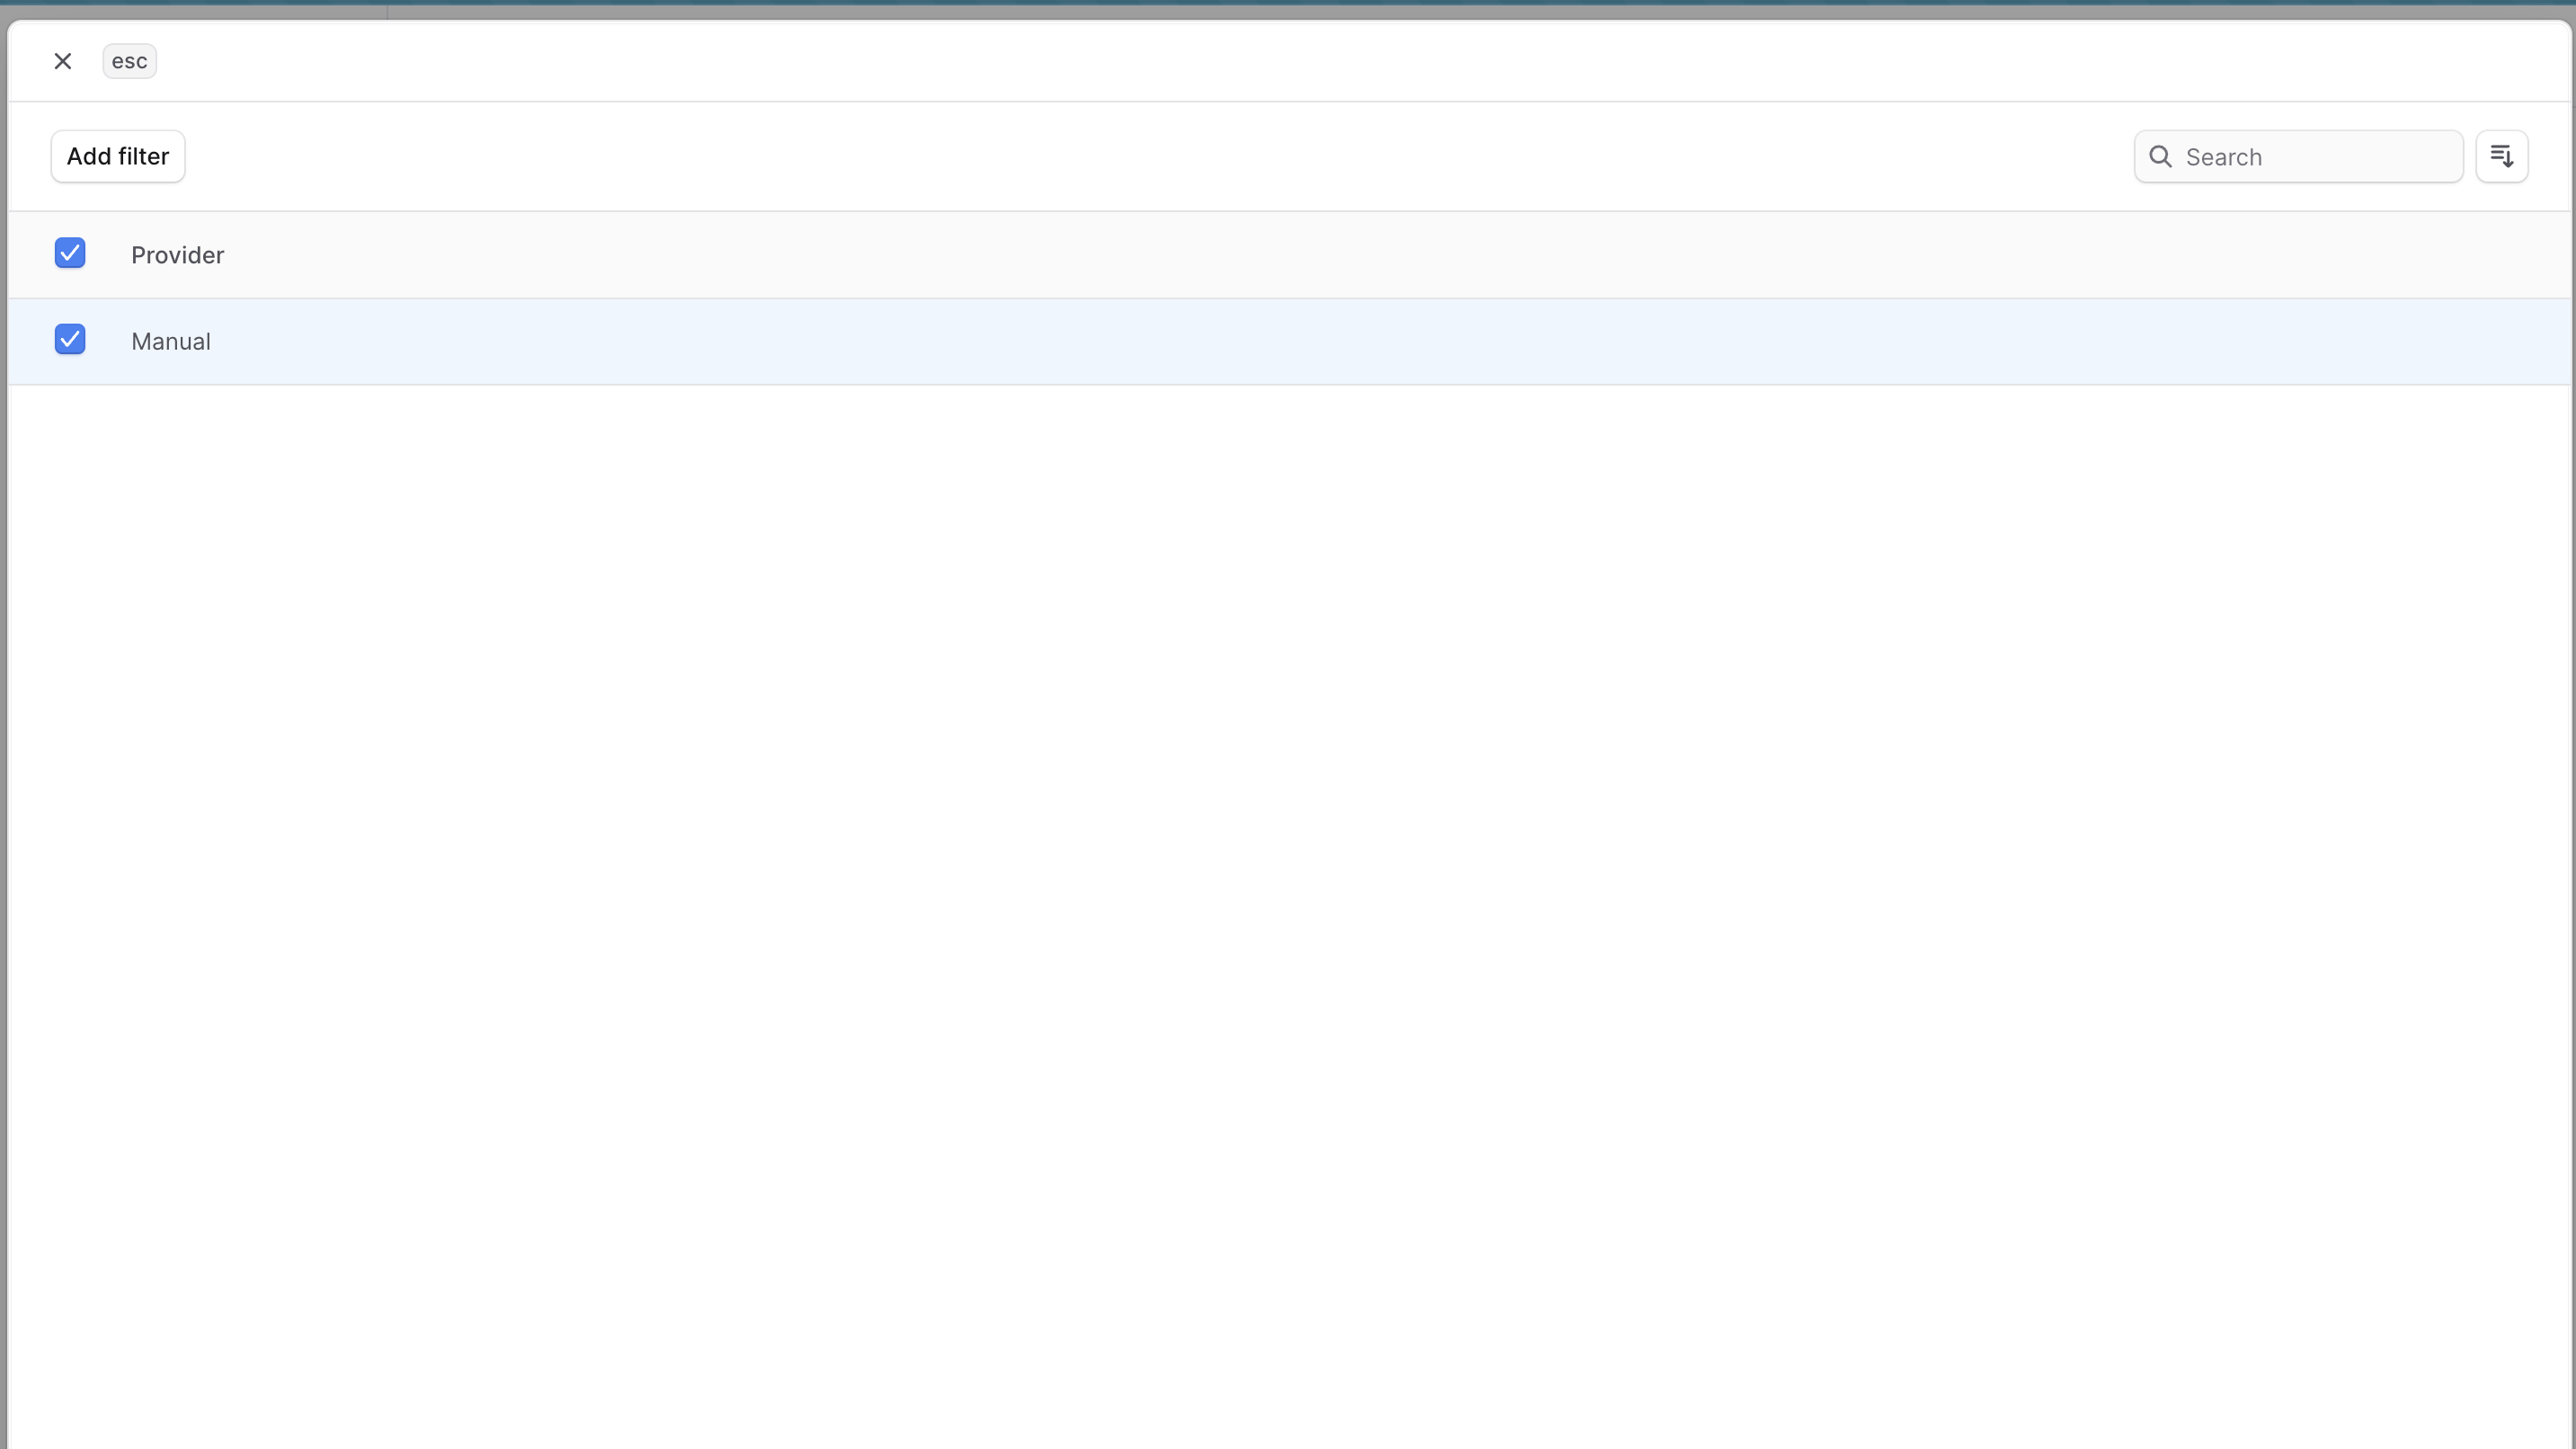
Manage Fulfillment Providers
To manage the fulfillment providers available in a location:
- Go to the location's details page.
- Click the three-dot menu in the header of the Fulfillment Providers section.
- Choose Edit from the dropdown.
- In the list that opens, select the fulfillment providers to associate with the location, or unselect the ones you want to remove.
- When you're done, click Save.
Delete Location
Deleting a location is irreversible and deletes its service zones and shipping options.
To delete a location:
- Open the location's details page.
- Click the three-dot menu in the first section's header.
- Choose Delete from the dropdown.
- Confirm by entering its name and clicking Delete.