Manage Returns
Learn about order returns and how to manage them in the vendor dashboard.
On this page
In this guide, you'll learn about order returns and how to manage them.
Order Returns Overview
After items have been delivered to the customer, they can return the items for a refund. These items are added back to stock or marked as damaged.
You can automate the Return Merchandise Authorization (RMA) process by supporting two ways of creating returns:
- The customer requests a return for an order through the storefront, which you can view in the vendor dashboard.
- Or you can create a return and inform the customer about it.
As an admin user, you can then manage the return to either cancel it or mark the items as received and refund the customer.
Find Return Requests of an Order
To find return requests of an order:
- Open the order's details page.
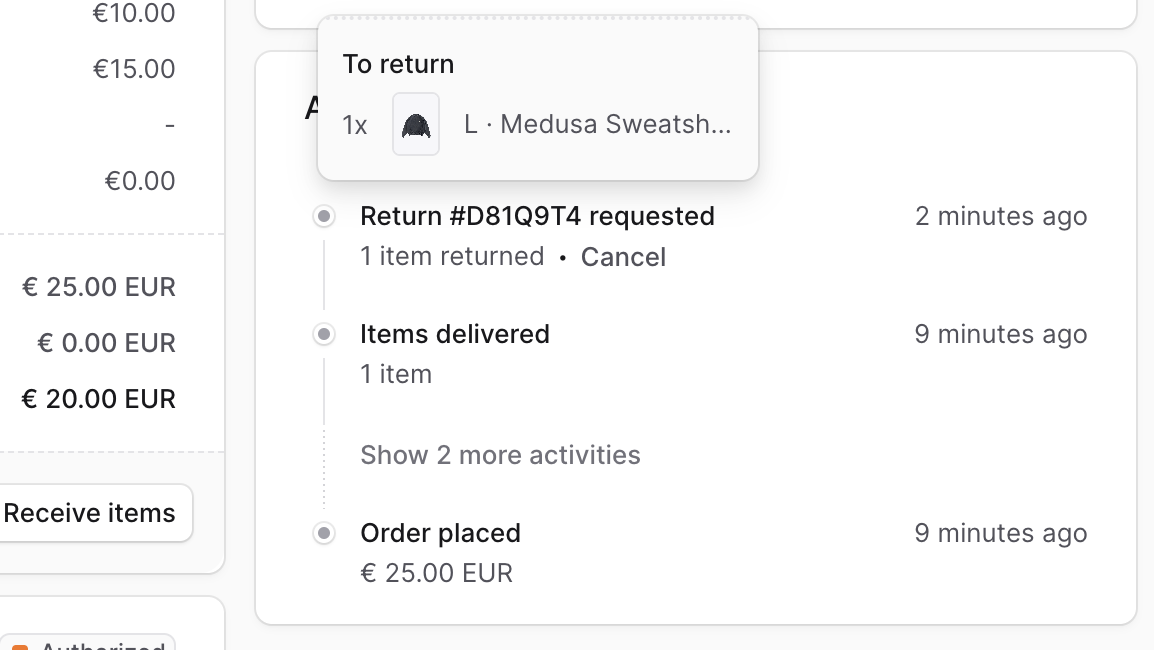
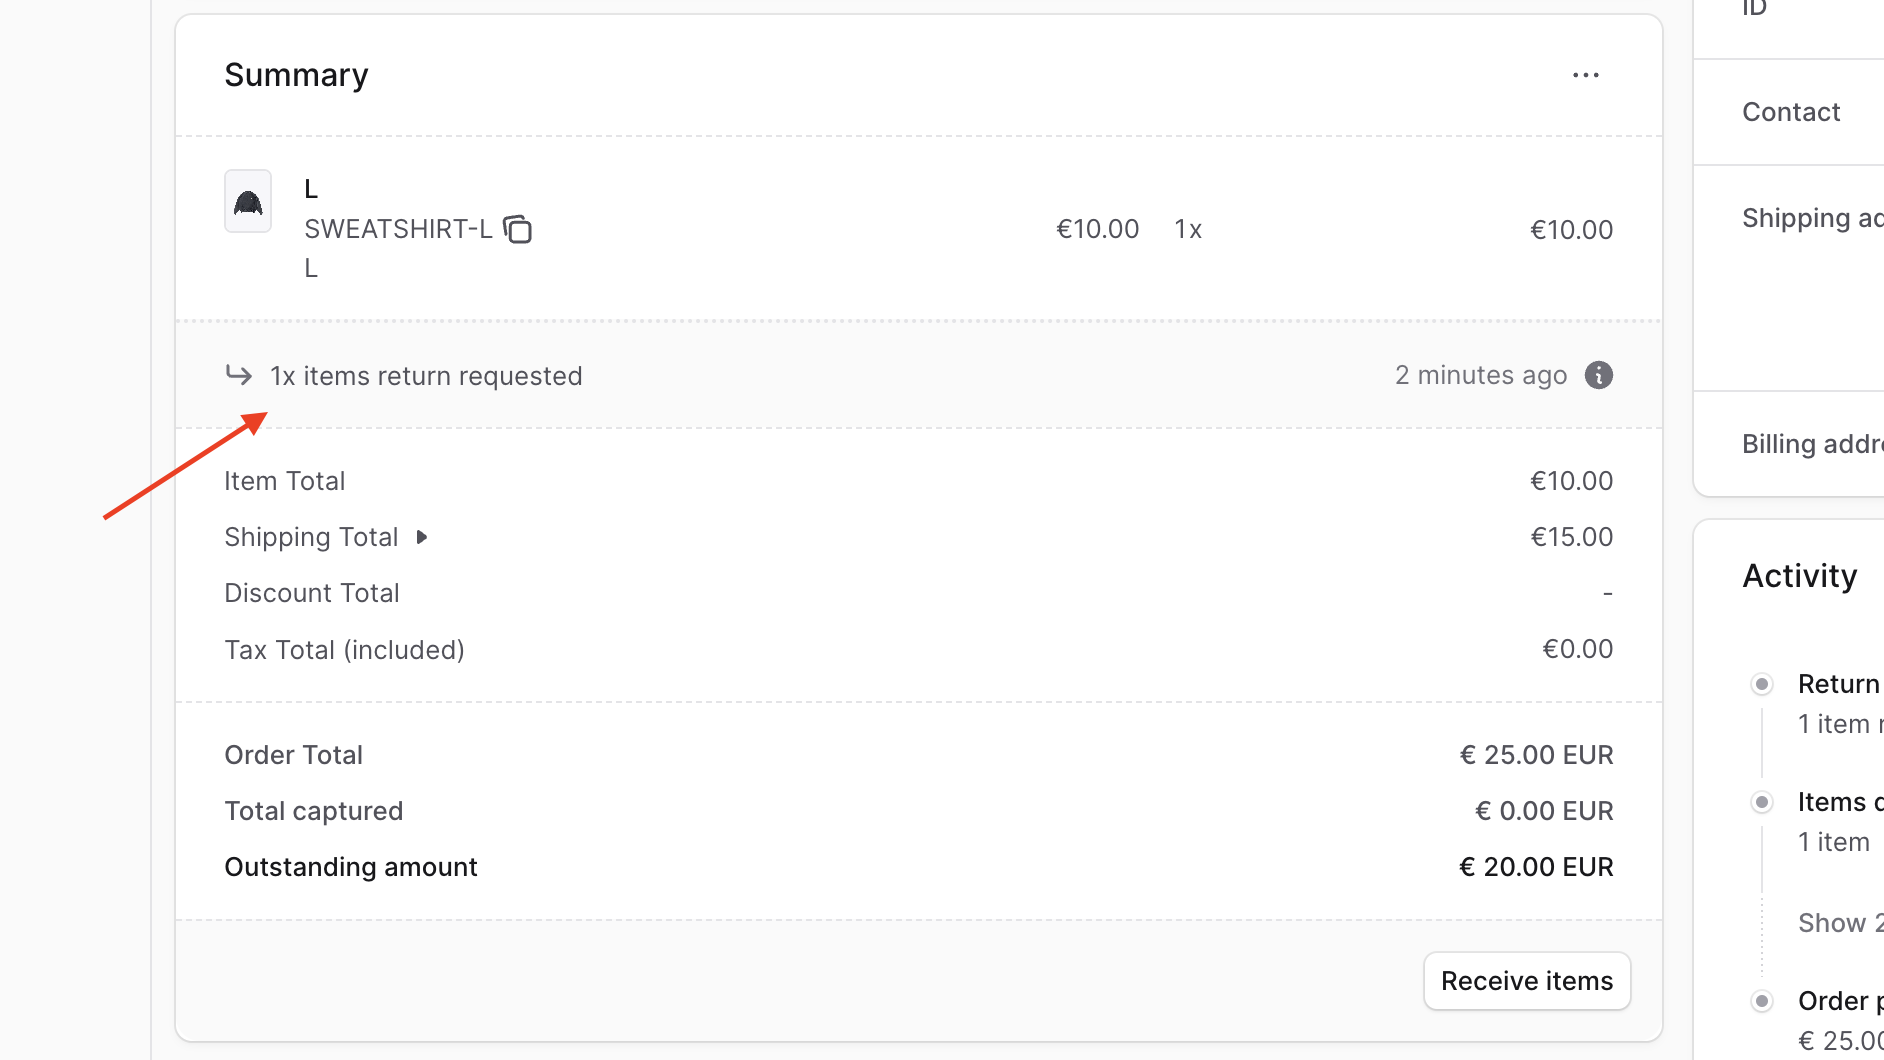
- In the Activity section, you'll find that a return was requested, which you can manage.
You'll also find the items requested to be returned in the Summary section, with a note below the items to be returned.
Create an Order Return
You can create a return from the vendor dashboard for delivered items in an order.
To create a return for an order:
- Open the order details page.
- In the Summary section, click the three-dot menu in the section's header.
- Choose Create Return from the dropdown.
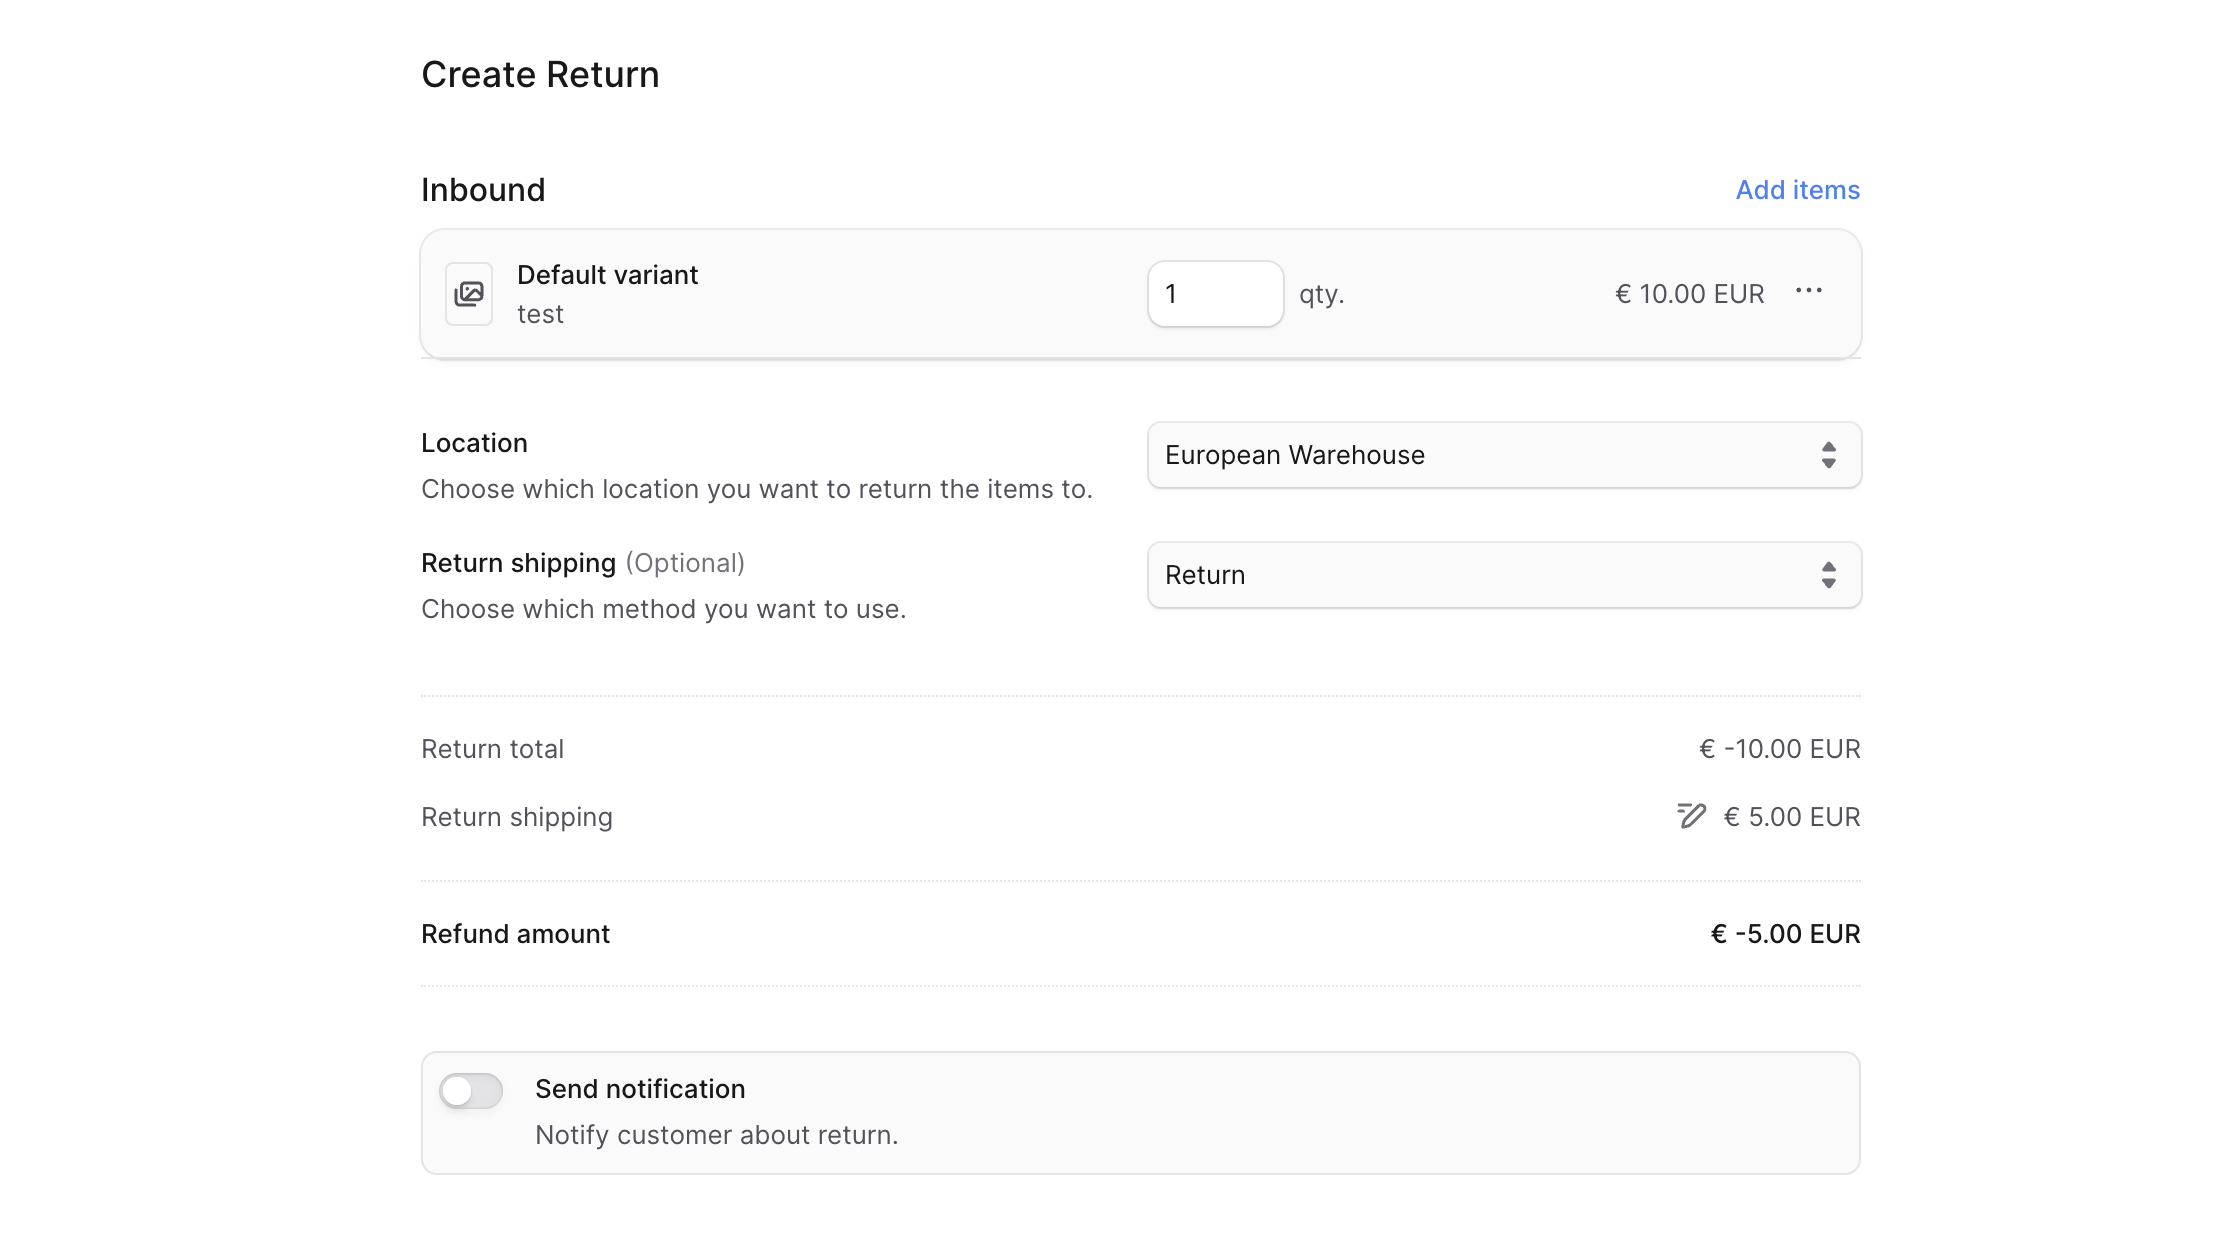
- In the form that opens:
- To add items to return:
- Click Add items in the Inbound section.
- In the list that opens, check the items you want the customer to return.
- When you're done, click Save.
- You can edit the quantity of the items to return by editing the input next to the inbound item.
- To add a reason for the returned item:
- Click the three-dot menu next to the item.
- Choose Add Reason from the dropdown.
- In the Reason select input, choose the reason for the return. You can add return reasons in Settings → Return Reasons to choose from.
- To add a note for the returned item:
- Click the three-dot menu next to the item.
- Choose Add Note from the dropdown.
- To remove an inbound item from the return:
- Click the three-dot menu next to the item.
- Choose Remove from the dropdown.
- For Location, specify the location to return the items to.
- While you can choose a location that the item doesn't have inventory in, later you can't receive the item unless you add inventory for the item's variant in the chosen location.
- For Return shipping, you can optionally choose a shipping option to use to return the item, subtracting the shipping cost from the return total refunded to the customer.
- To modify the return shipping cost:
- Click the edit icon next to the Return Shipping total.
- Enter the new cost in the input shown.
- To modify the return shipping cost:
- If you don't want the customer to receive a notification that a return has been created, uncheck the Send notifications toggle.
- To add items to return:
- When you're done, click Confirm Return to create the return, then confirm the action by clicking Continue in the pop-up.
This creates the return, which you can see in the Summary and Activity sections of the order's details page.
Mark Return Items as Received
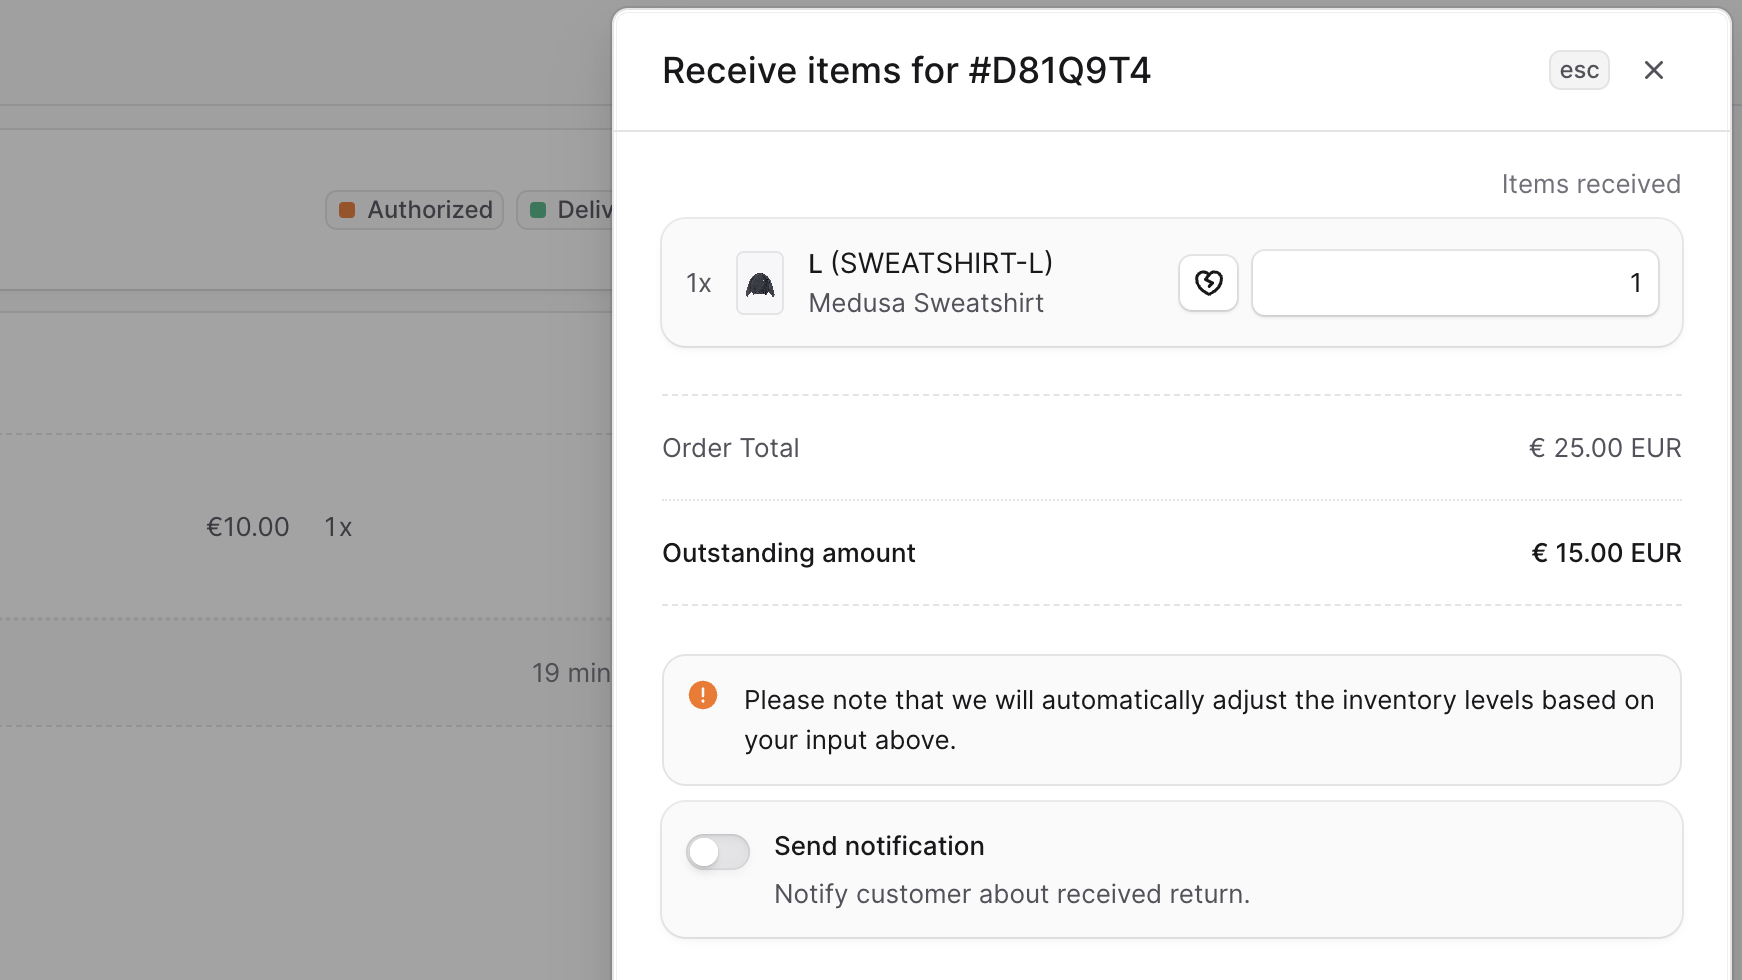
Once the customer returns the item, you can mark it as received. This triggers a refund to the customer and the non-damaged item quantity is added to the stock quantity in the inventory.
To mark return items as received:
- Open the order's details page.
- In the Summary section, click Receive items.
- In the side window that opens:
- For each item part of the return:
- Enter the quantity that isn't damaged and can be added back into stock in the input shown next to the item.
- To add damaged quantity:
- Decrement the quantity that isn't damaged by the damaged amount.
- Click the damaged-quantity button next to the item.
- Enter the damaged quantity.
- To notify the customer that the return is received, check the Send notifications toggle.
- For each item part of the return:
- When you're done, click Save.
Cancel Requested Return
You can cancel a return, whether requested by the customer or that you created.
Canceling a return is irreversible. The customer would have to request a new return or you can create a return request.
To cancel a requested return:
- In the Activity section, click Cancel next to the Return Request item.
- Confirm the cancellation by clicking Confirm in the pop-up.
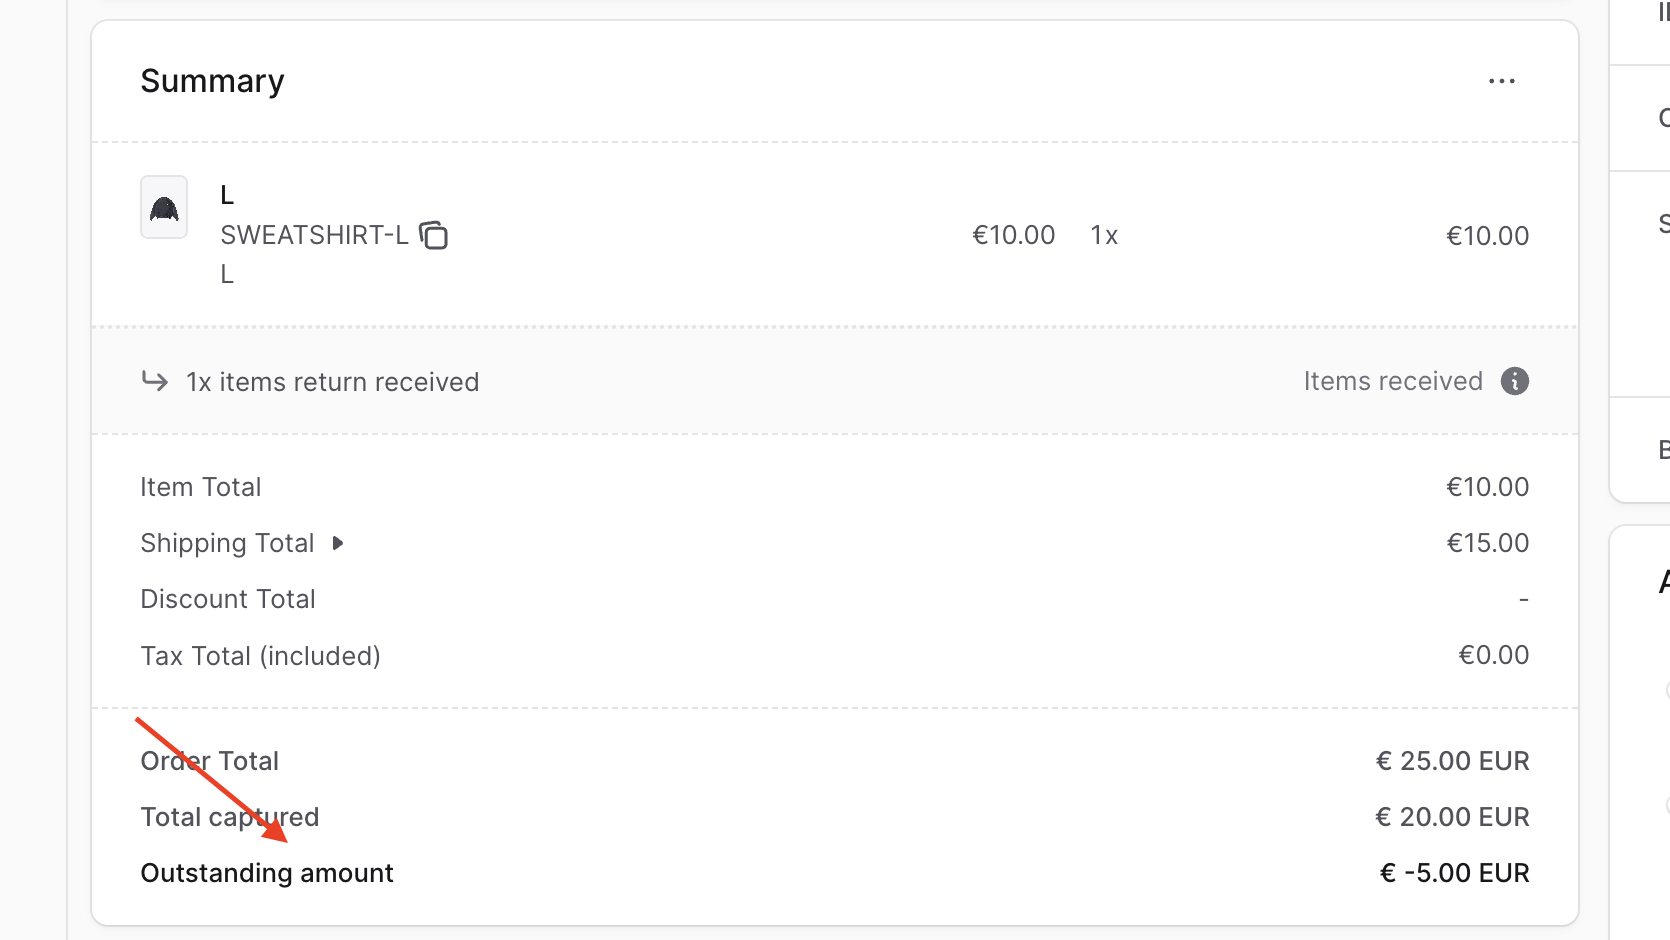
Refund Customer for a Return
If a return causes an outstanding amount, you can see it in the Summary section of an order. Refer to Manage Payments to learn how to refund the customer for the return.